First time normal mapping a character - WIP
polycounter lvl 13
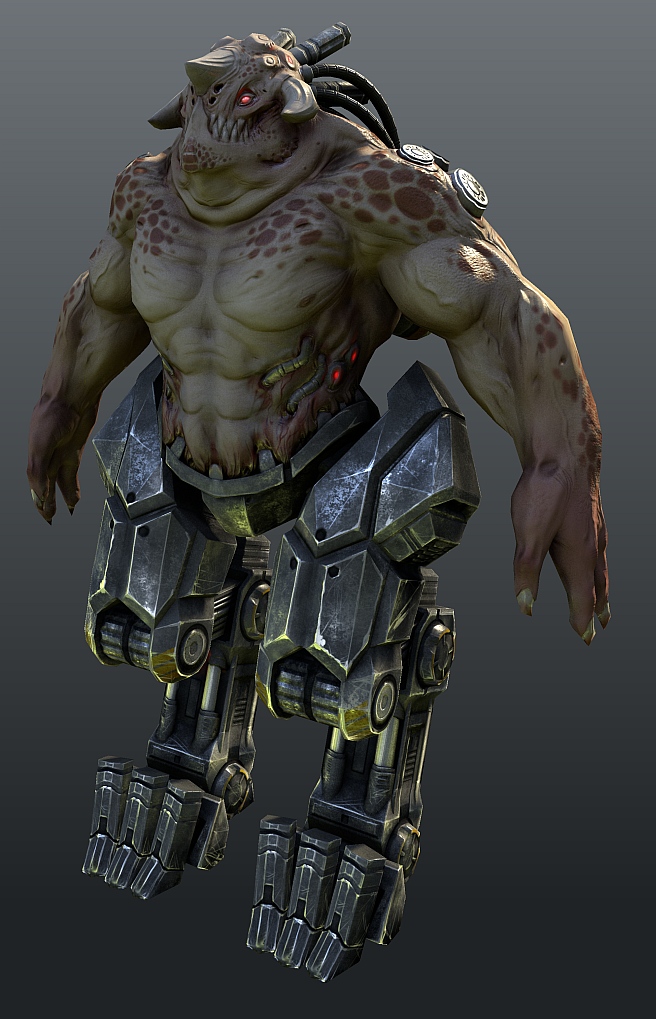
Almost-final result, crits still very welcome!
Original post:
Sooo this is where I'll be trying to figure out normal mapping, cuz I felt it was about time I did. And hopefully learn a little more about high detail modeling in the process.")
Crits are of course highly appreciated.
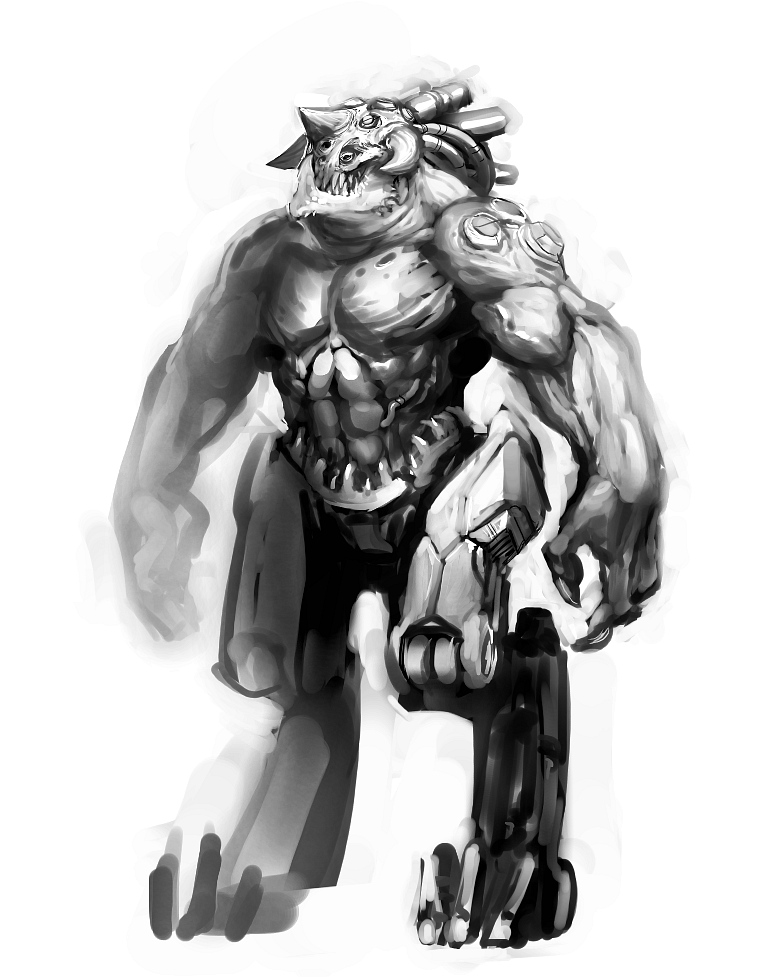
Here's the monster/demon guy I designed for this, he's not too original but it's for practice anyway. Purposely added both some organic and some inorganic hard surfaces in there, to get some practice in on both, though I'll probably wing it with some of the design details as I go.
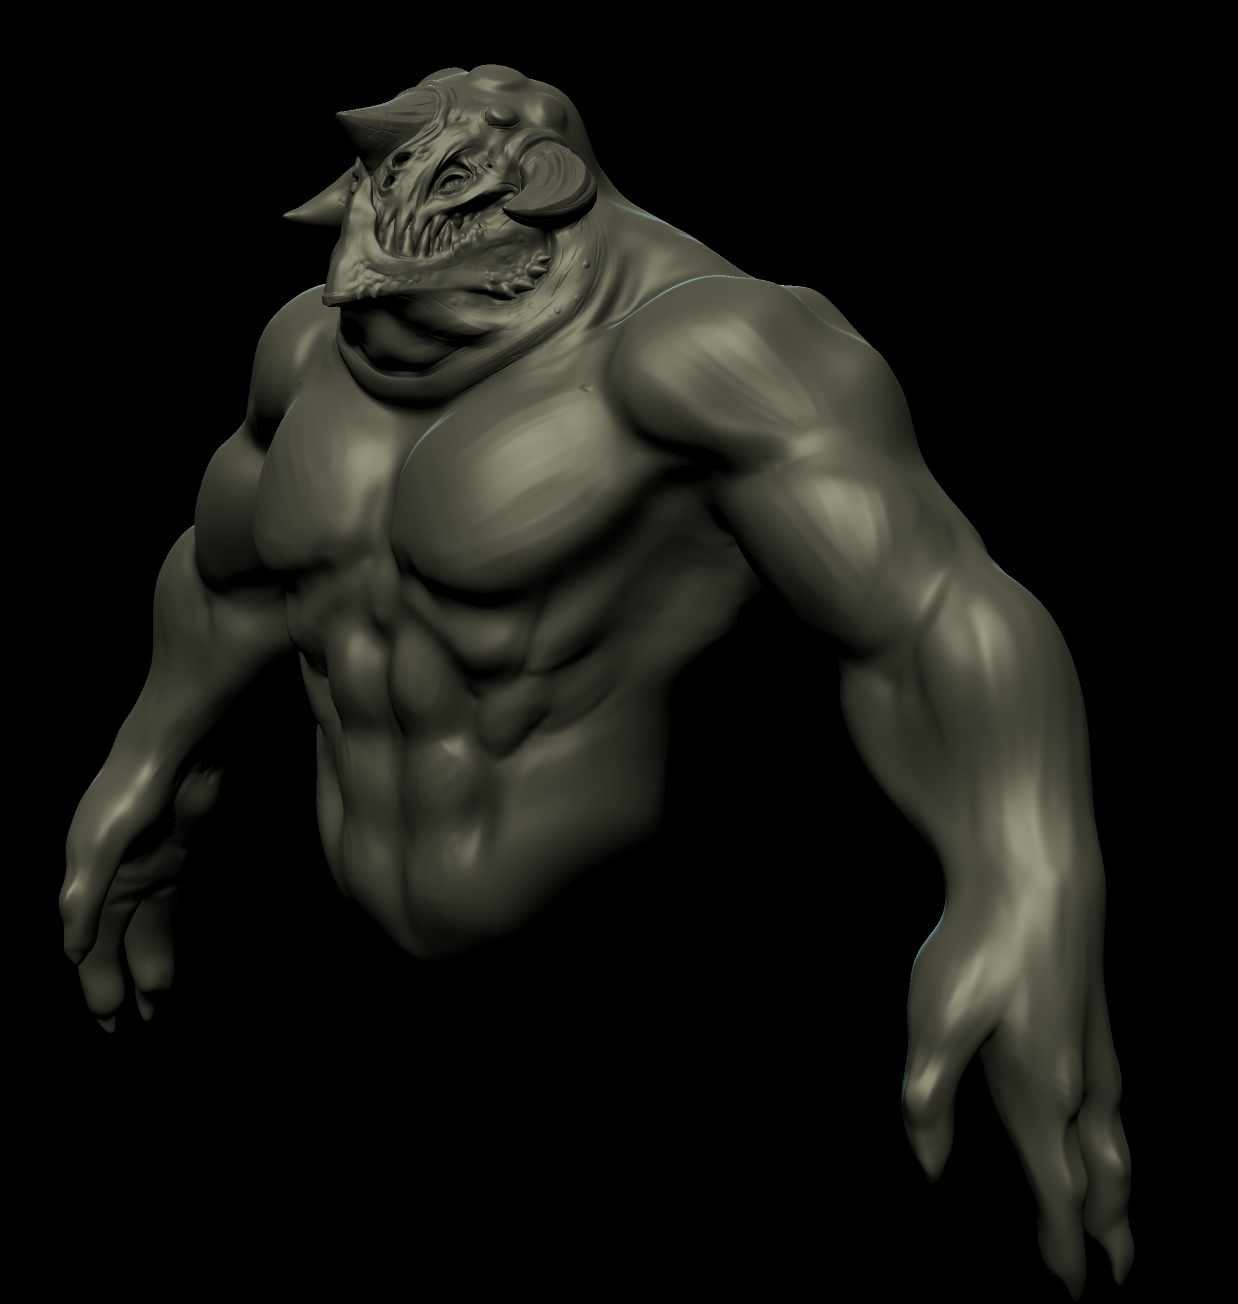
And here's where I'm at so far with my sculpt. I'm gonna model the metal parts separately.
PS: Could people tell me what techniques they use to speed up their modeling process? I'm talking lowpoly, highpoly, texturing, whatever. I find myself often spending tons of time trying to get all the details right, but I heard that a model like this is expected to be finished within a day in the industry. That seems pretty daunting to me, right now anyway.
Original post:
Sooo this is where I'll be trying to figure out normal mapping, cuz I felt it was about time I did. And hopefully learn a little more about high detail modeling in the process.
Crits are of course highly appreciated.
Here's the monster/demon guy I designed for this, he's not too original but it's for practice anyway. Purposely added both some organic and some inorganic hard surfaces in there, to get some practice in on both, though I'll probably wing it with some of the design details as I go.
And here's where I'm at so far with my sculpt. I'm gonna model the metal parts separately.
PS: Could people tell me what techniques they use to speed up their modeling process? I'm talking lowpoly, highpoly, texturing, whatever. I find myself often spending tons of time trying to get all the details right, but I heard that a model like this is expected to be finished within a day in the industry. That seems pretty daunting to me, right now anyway.
Replies
The character you are doing would not be done in just a day. You might need to get a stage approved and that could take a day in itself. But what it really comes down to is how up-close/important is the character? If not important at all you might be expected to crank it out pretty fast... but I don't know about a day. If the character is really important you might even have up to 6 weeks. It would range really. The stuff that people talk about that needs to be done in a day is shit that is just going to be blown past in the game that no one is probably going to look at. Filler you know?
As for your model... I think you need to slow down on the face and really work on the form of everything else. The anatomy is looking kinda "gummy" at the moment and you might check some anatomy references to better nail the connection between bicep elbow and forearm. The wrists could use some attention as well.
As for the techniques... that is such a hard thing to answer because you asked and extremely broad question. Almost like a "tell me everything," and I don't know if anyone wants to try and guess at the information you don't know.
What I can tell you is that you are getting caught up in details too soon. You should have blocked out the basic form of the character, kicked it back into a modeling package like max and then blocked out everything... mechanical parts and all so that you have something to sculpt around so that you don't end up sculpting some details for nothing and so that you can sculpt closer to the final result you are looking for.
Hope all of that helps.
Ah I guess something like a player character would have to take a lot more time than just a background character.
I did actually block out the shape of the torso in blender before starting, and I did spend some time trying to get the shape of it right in mudbox before subdividing and working on the details, though I guess you're right that maybe I was a little too eager to start on the fun stuff, lol. And yeah, having all the major shapes there before I begin sculpting, instead of just the torso, does seem like a good idea. I've blocked out the basic volumes of the mechanical parts, and I'll probably work on them a bit more before I continue sculpting:
And yeah looking back my question was a bit... broad, haha. I guess if I were to get more specific, I'd ask, what would one do to speed up the very basic issue of putting down all the small details? When you've done all the preparation and blocking out and planning, and you get down to the hard work of simply detailing every area, what would you do to make it quicker, but still not end up rushing and making it look like, well, ass?
Here's some progress, not entirely finished with the flesh sculpt yet but getting close. Gonna try to finish the whole thing this weekend.
Having a bit of trouble with the whole making it up as I go thing... guess I just need to work out my concepts more next time. Or learn to improvise better. :P
Any crits/comments? Is this going work well/not so well when creating my normal map?
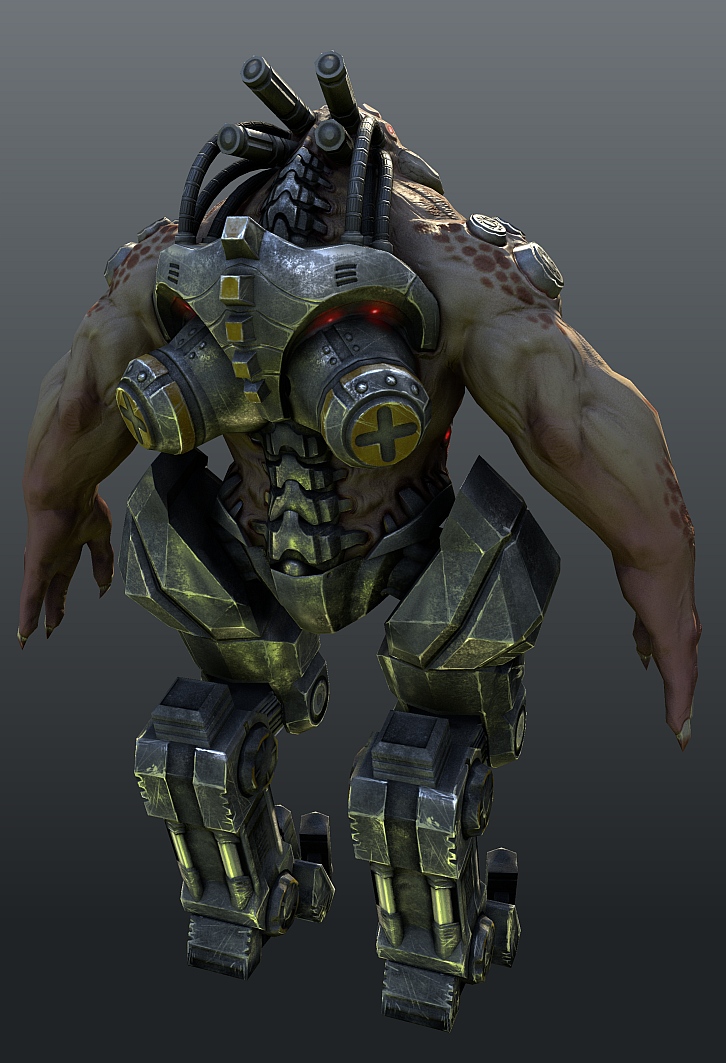
Anyway, I've finished the modeling, still not too sure about some of the details, but high poly modeling is just going way too slow for me, I'm gonna have to find out some more optimal workflow or something. Or just sculpt all my mechanical details, but that seems impossible for some shapes, and I can never get it as nice and clean looking as some people can.
But whatever, here's my progress so far, working on my lowpoly right now.
PS: should I add textures and materials on the highpoly, or is it acceptable to do that on the lowpoly?
I wonder what people think about painting details on normal maps? It seems easy to do, but on the other hand, if you need to change something in your base model and need to rebake, you're gonna have to do that all over again.
I'd recommend the Eat3D hard surface techniques in zbrush tutorial - it shows some really nice techniques for getting clean hard surface results out of zbrush, which can greatly speed up that portion of the modeling.
You do NOT need to uv unwrap the high poly model, unless you plan on making texture maps for the high poly model.
Zbrush and 3Dcoat have vertex painting, which allows you to paint on vertices, so you could paint your texture onto your high poly and bake it onto your low poly, without having to unwrap your high poly.
What I typically do for something like this is bake out masks, to make texturing easier. The simplest way to do this (in my experience) is to take your model into zbrush, hit auto groups, turn on polypaint, then hit polypaint from polygroups. This will give every unique object it's own solid color, which (when baked out) acts as a mask in photoshop.
I paint normal map details in photoshop a lot, since I find it a lot easier to add certain details in 2d. Having to rebake wont be an issue as long as you keep your painted details on a separate layer, and don't change the UV layout.
an aggressive napkin: I honestly don't remember any specific ones, but I think I found some fairly good material on youtube.
dirigible: I'll check out those tutorials... I don't own Zbrush unfortunately (and my trial expired long ago), but I'm sure some of the techniques will still apply. Good to hear I can get around having to redo stuff if I have to rebake though.
Anyway, here's a first test bake, just the normals. Upper body looks alright I think.... lower body decidedly less so. Anybody got any advice? I baked most of the different mechanical parts separately from each other. The toes seem to have their normals inverted somehow.
achillesian: On the lowpoly or the highpoly? But yeah either way some of the edges do look a bit sharp, especially on his knees there I think. I've tried to fix it.
ZacD: You're absolutely right about the chunky look, I redid the upper legs and I'm much happier with them now. Whaddya think?
I'm adding some more geometry to the lowpoly as well to make the plate sections stand out better. Hopefully that'll help.
I also figured out what was causing some parts of the legs to look weird... nobody told me you couldn't flip over UV islands without messing up the normal directions! lol
I do have a new issue with a big nasty seam on the lower spine (see closeup image)... which is weird because it doesn't appear on the upper spine. I took all the precautions, like not baking on half a model but on a whole one, making sure there were no hard edges there... etc.
Anyone have any idea what could be causing it to show up in one place but not the other? I'm stumped.
As always, any other crits are welcome.
As for the seams are the normals smoothed? The entire mesh is mirrored or only certain parts?
The whole mesh is mirrored, I'll probably try a partially mirrored mesh for a next project.
I'm not too sure on the seam, it could be an issue with the cage not lining up.
I've been working on the diffuse and specular, mostly been working on the lower body.
Crits welcome!
Very nice surfacing.
Good job man! Start a new one!