Fruit-Cart "Fruit" Hrlp
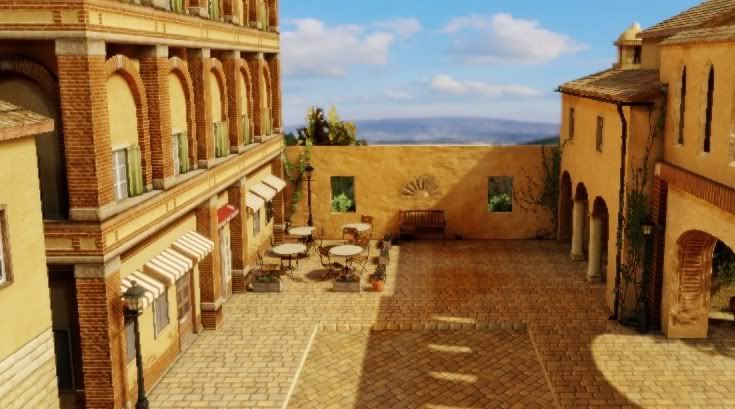
Whats up everyone, as of right now i'm finishing up a scene i'm doing for my portfolio thats about 70% done. It's looking kind of empty as of right now so i'm adding a fruit-stand to fill things up a bit.
I made the fruitstand, now i just need the model the "fruit" itself. So i'm wondering whats the best way to go about doing that. Should i bake it down to a flat plane, or model each one individuality?
I want to get the kind of result rshama got here. I try'd looking at his wireframe but i cant really tell what he didd.
Any help would be much appreciated") , Thanks
, Thanks
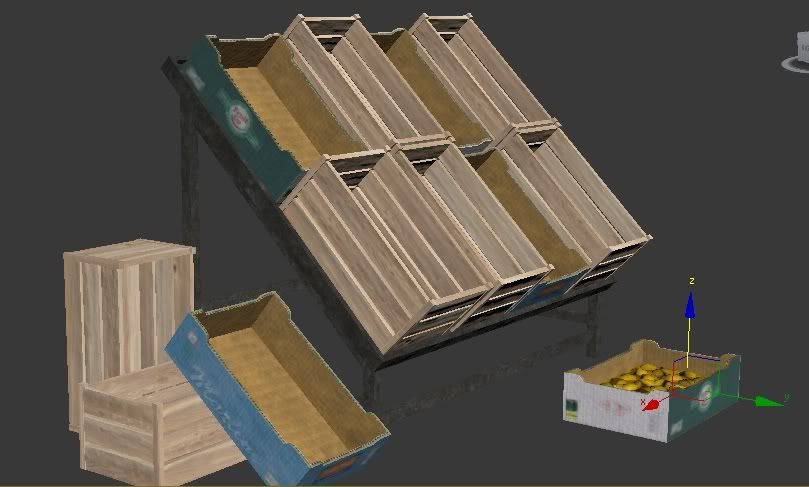
*obviously i dont want it looking like the sh!t oranges in pic 2 lol
I made the fruitstand, now i just need the model the "fruit" itself. So i'm wondering whats the best way to go about doing that. Should i bake it down to a flat plane, or model each one individuality?
I want to get the kind of result rshama got here. I try'd looking at his wireframe but i cant really tell what he didd.
Any help would be much appreciated
*obviously i dont want it looking like the sh!t oranges in pic 2 lol
Replies
- Creating oranges
- Creating a tilable texture by baking the texture
- Baking the AO and Normal map
- Add to simple plane and cutting in geo.
easy peasy
If you model every dimple in the fruit but its sitting next to a 3 sided lamp post its pointless. Whatever maintains a constant density is what you would use. If the lamp post is nice and rounded with good geometric detail then your fruit probably needs to be on the same level.
How detailed do you need to make them to get them to achieve your goal? How detailed are you allowed to create them?
With unlimited time and resources you would model every piece and each one would look amazing on its own. The player/viewer would be able to pick it up and look it over and then smash it flat on the ground. That being your high water mark you start to answer the other questions and dial it back until you hit something reasonable.
I lean toward creating some high poly sculpted fruit complete with a very simple normal map (which will also be captured when baked) then arrange how it would be in real life. You might experiement with using physics or particles to drop fruit into containers but if you're not familiar with those methods it could be just as fast to place it all by hand. (I'm not saying don't learn to use physics to scatter things around but you do need to get familiar with it to save you any time.)
Then make a low poly version of that by retopo'ing the entire mass of fruit with one solid chunk of geometry. Making sure the important parts are represented and the not so important parts are glossed over with little geometry.
Keeping that low poly retopo model in mind when arranging the high poly fruit helps you control the final count. Then baking that down to a unique map.
Also knowing what will and won't bake well is key to placing the high poly fruit as well. So some experimentation is probably in order.
Keeping that overall scene density in mind also helps greatly at almost every stage of this process. This translates to materials as well which you probably want to work within a 4:1 pixel ratio. 4 pixels per every game unit. If you have a fruit surface that is 16x32 game units, then you go with a 64x128 pixel map. Knowing that is the output size of your maps will help you determine how detailed to make the objects.
Using that ratio on everything else you achieve a nice textel density that doesn't have ultra sharp trashcans sitting on ultra blurry sidewalks.
I would do what Mark suggests - model a high poly (doesn't need to be very high poly, just enough for the details) fruit, and I'd also texture it, so you can save time on painting a diffuse that respects the intersections of each piece of fruit. Also model a low poly single piece of fruit. Render the highs out to both, and tart up your baskets with 1-2 individual pieces of fruit to break up tiling and add interest (a banana hanging over the edge of the basket, piece of fruit lying next to the basket/on the ground, etc).