Sketchbook: PatrickL
polycounter lvl 9
I have decided it is time to stop accepting my mediocre skill level, and to really raise the bar for my work so that I can build a decent portfolio. To do this, I'm going to start posting a metric shit ton of images of my progress here, and I want you guys to rip them apart. I'm also going to point out every flaw I notice, and every difficulty I encounter so that you may ring in on those as well. (You can find these comments below each image.)
There are two main pillars I want to improve on: Texturing and High Poly Sculpting
So without any further ado:
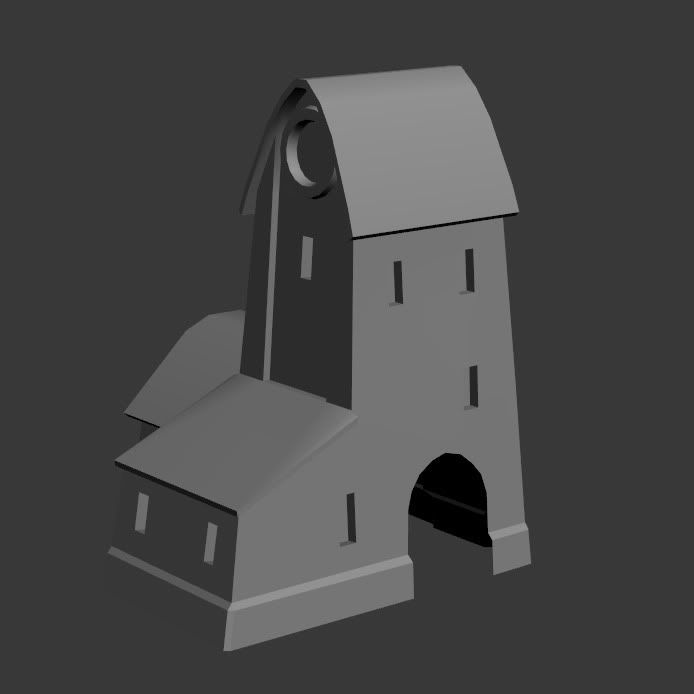
I made the huge mistake of leaving a gap in the mesh of this building for an additional door model to take fill it with, so that I could reuse that door with other buildings. This filled my mesh with tons of horrible triangles.
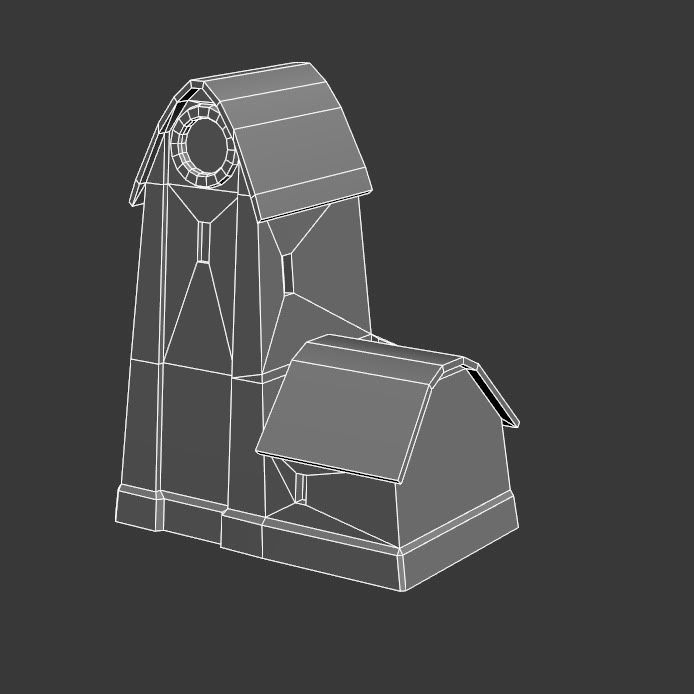
Hiding said triangles is this rear image. It displays my greatest failure, the little back section. I initially made this a separate mesh, but didn't like how it left small edges, so I tried to line them up AFTER skewing the walls. This meant I had a tiny gap in between where the two met. I tried fixing this several times, but ended up botching it even worse. This mean further, poor triangulation on the other side as well.
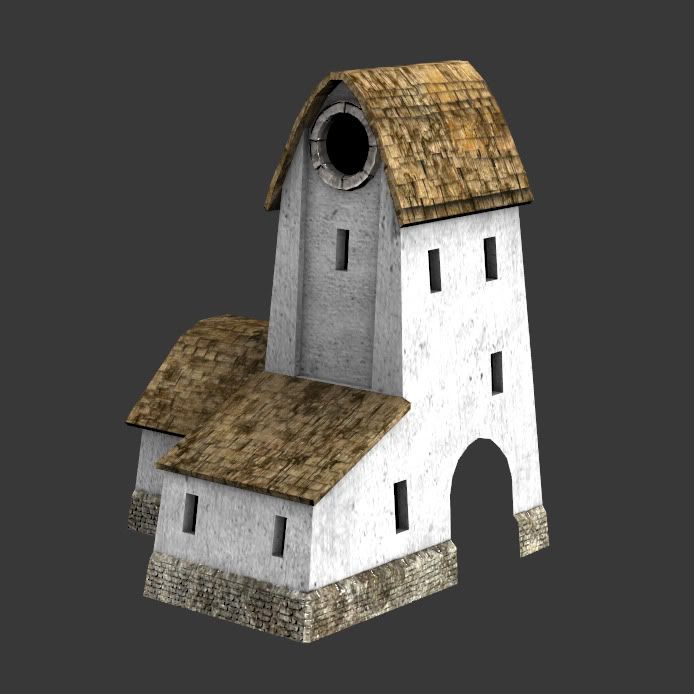
This texture is the combination of several baked AO's and Normals stitched together, thrown on top of a few tweaked photos. Why stitch several ones together? I couldn't merge them. Seriously. I made the roof tiles as separate geometry and painted them on, but I couldn't import them into the Zbrush scene that had the rocks sculpted.
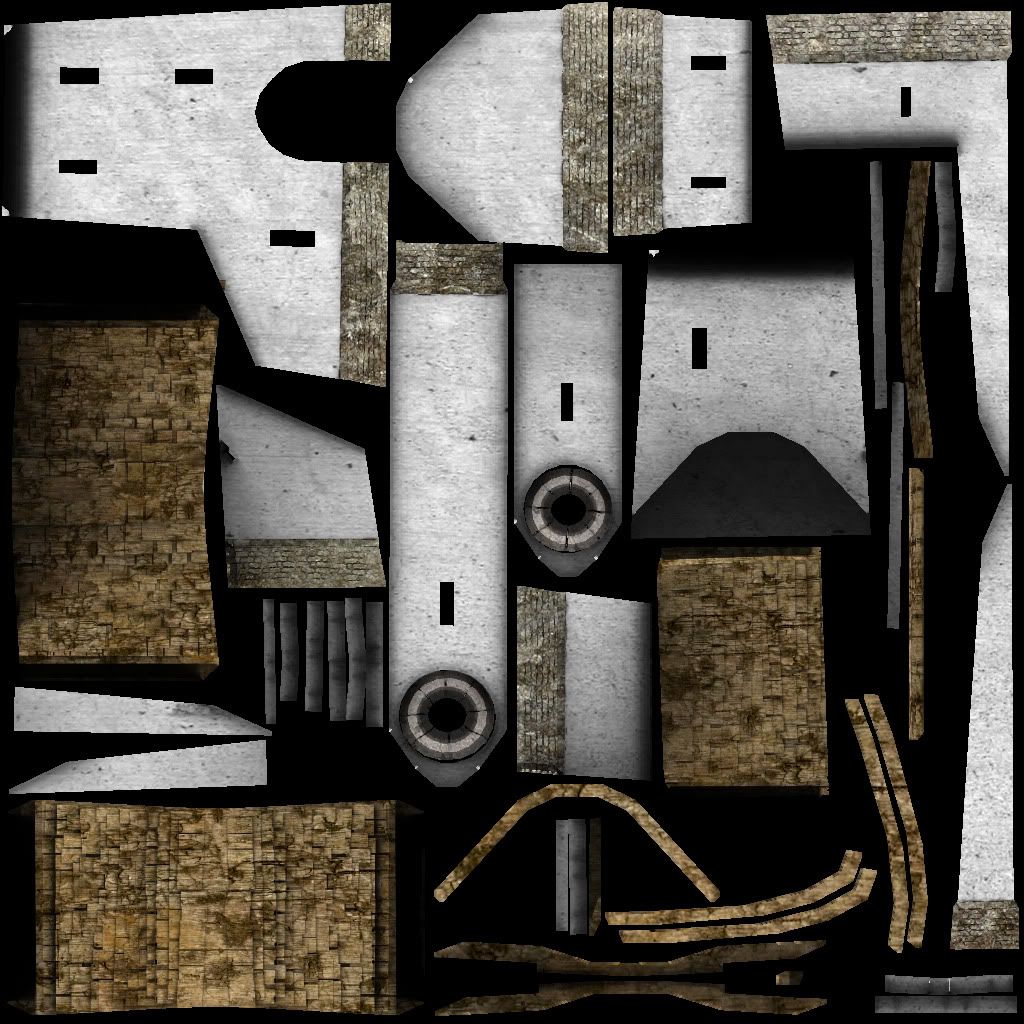
Here is my "final" diffuse on the building. It's not too terrible, but I'm not happy with it. For starters, I wanted to replicate a building that was inside of an existing game, but I got lazy and stopped checking my reference. This ended up with several colors being thrown around and poor direction. Also, after stitching so many AO's together, it slowly got sloppier and sloppier. The unwrap itself is alright, except a few poorly placed pieces. The circular stones didn't get enough pixel space, and the roof top edges take up too much.
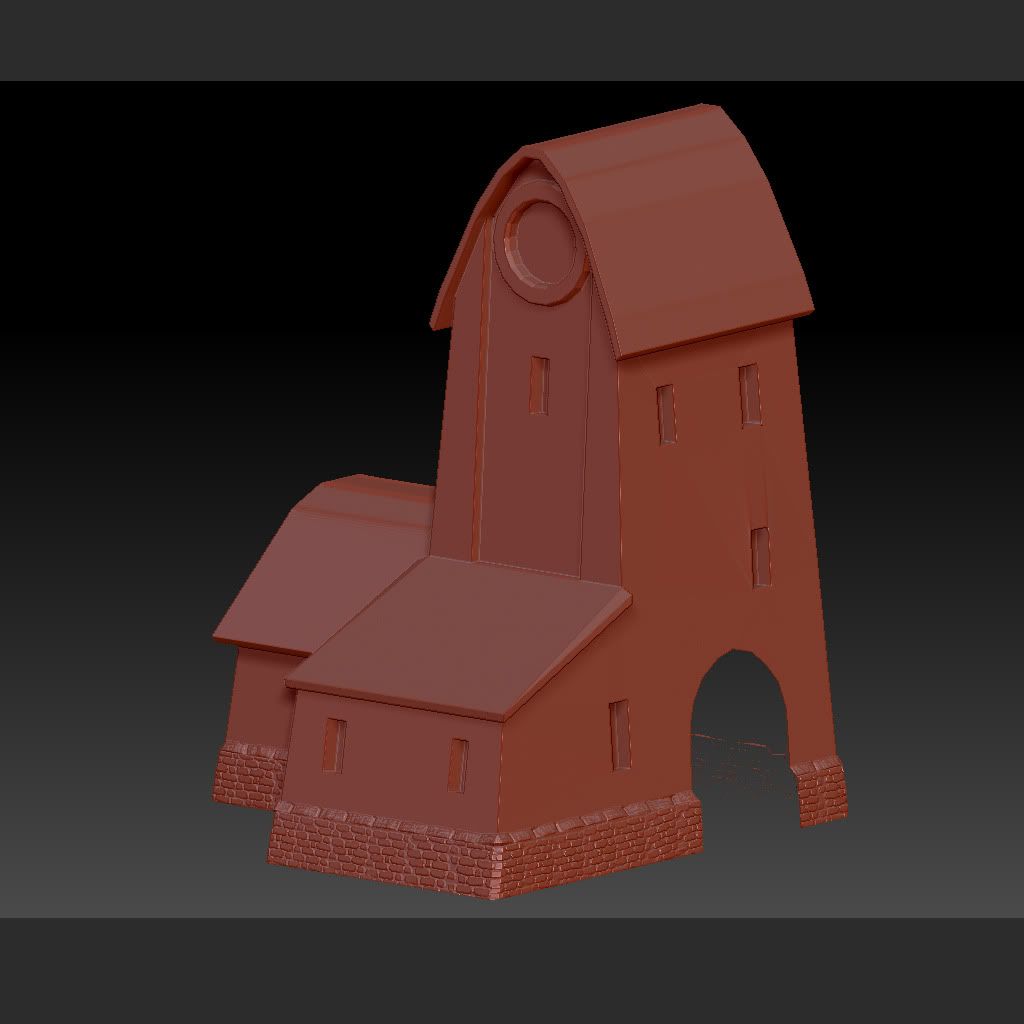
Here is the sculpt of this building with only the rocks. These rocks were only my second REAL usage of Zbrush, and I think they came out decently. However, the rest of this building was nearly impossible to sculpt. The triangulation of the mesh meant poor subdivision, and my smooth groups vanished inside Zbrush... So together, I got a lot of nasty deformations on my final Normal map.
There are two main pillars I want to improve on: Texturing and High Poly Sculpting
So without any further ado:
I made the huge mistake of leaving a gap in the mesh of this building for an additional door model to take fill it with, so that I could reuse that door with other buildings. This filled my mesh with tons of horrible triangles.
Hiding said triangles is this rear image. It displays my greatest failure, the little back section. I initially made this a separate mesh, but didn't like how it left small edges, so I tried to line them up AFTER skewing the walls. This meant I had a tiny gap in between where the two met. I tried fixing this several times, but ended up botching it even worse. This mean further, poor triangulation on the other side as well.
This texture is the combination of several baked AO's and Normals stitched together, thrown on top of a few tweaked photos. Why stitch several ones together? I couldn't merge them. Seriously. I made the roof tiles as separate geometry and painted them on, but I couldn't import them into the Zbrush scene that had the rocks sculpted.
Here is my "final" diffuse on the building. It's not too terrible, but I'm not happy with it. For starters, I wanted to replicate a building that was inside of an existing game, but I got lazy and stopped checking my reference. This ended up with several colors being thrown around and poor direction. Also, after stitching so many AO's together, it slowly got sloppier and sloppier. The unwrap itself is alright, except a few poorly placed pieces. The circular stones didn't get enough pixel space, and the roof top edges take up too much.
Here is the sculpt of this building with only the rocks. These rocks were only my second REAL usage of Zbrush, and I think they came out decently. However, the rest of this building was nearly impossible to sculpt. The triangulation of the mesh meant poor subdivision, and my smooth groups vanished inside Zbrush... So together, I got a lot of nasty deformations on my final Normal map.
Replies
This sword came out fairly well. I sculpted the handle inside of Zbrush, and did the blade inside of 3ds Max. The mistakes with this one are the texture and the maps. As you can see on the left, my blade has a horizontal seam cutting through it just above the design. This is from my normal map having an edge to it AND my textures not aligning. Both products of laziness.
Why all the extra space? I didn't need it for the sword, so I figured I would be able to squeeze another prop's texture into that space... I just never did anything with it. The sword's diffuse is hand painted with an AO tossed over it. The handle looks great when light hits it just right, but otherwise it was left looking really flat, dark, and dull.
I consider this my greatest piece yet, and it still looks very mediocre. The low poly design worked wonderfully, but my lack of experience in Zbrush left this first sculpt very plain and boring. And the wings? They just look like a mess, plain and simple.
The stone here is a combination of two images and an AO map. The gold is hand painted and probably my best attempt yet at replicating that damnable metal. I don't know how to paint textures in Zbrush yet, so I had to cut out each of those stones individually in PS...