Dr Grordbort Infallible Aether Oscilator - FMOM Wave Disrupter
polycounter lvl 11
I saw a collectible prop on Weta's website and decided to have a crack at it for a game model... since I don't want to drop $700 to buy the prop I figured might as well make my own haha.
http://www.wetanz.com/holics/index.php?itemid=19&catid=4

Here's the high poly i have for it so far. i thought i was done, but i noticed i missed one small part on the right side of the gun
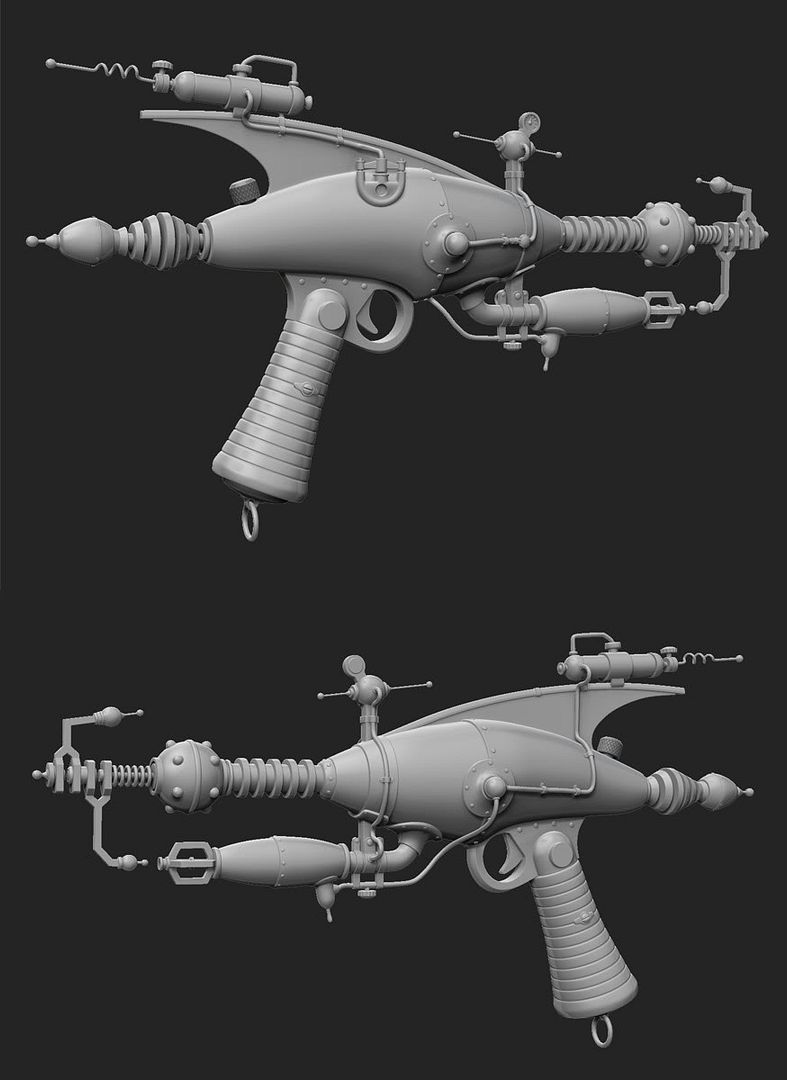
I'm nearly done with the low poly should have it ready to show by tomorrow.
Let me know what you guys think or if i screwed up on anything
http://www.wetanz.com/holics/index.php?itemid=19&catid=4
Here's the high poly i have for it so far. i thought i was done, but i noticed i missed one small part on the right side of the gun
I'm nearly done with the low poly should have it ready to show by tomorrow.
Let me know what you guys think or if i screwed up on anything
Replies
I don't see anything wrong with your HP, but i wanna see you texture this, should prove interesting.
(btw too bad the coolest one, that blunderbuss type thing, is $7000...)
the poly count is a bit higher than i would have liked, but i think i optimized it down to around as low as it will go
its currently at 13.5k tris so a bit higher than unreal tournament 3 was doing
if you guys see any waste or places to improve let me know.
On the low poly the main rounded segment and the bulb parts seem like they might be a little dense. I think you could go in and collapse every other vertical edge (especially near the focal points and you wouldn't notice much difference in the silhouette. I think you could do a good deal of collapsing edges on a lot of the rounded parts, especially the tube under the barrel because that would be hard to see from a fps view. Since it is a portfolio piece its gotta look great from the perspective too, but I think it is still a bit dense. You'll rarely see it from the straight on view, so that part of the silhouette isn't as important.
Any place where the geometry is coming to a focal point you should be collapsing edges so that the density remains the same.
Also, those washer type things you have around the capsule and the sphere could be baked into the low poly and shouldn't need geometry.
I think realistically you could get it down to 10k. A lot of places where the geometry is so dense you can't see lines on the thin parts could be reduced as well.
Branching out from characters huh?
@PredatorGSR - thanks for the tips dude ill puts around with some of the edges a bit more to experiment with the best solution and poly count. and thanks for the help with the beveled edges issue.
@tehrobster2 - its a pretty fun model to make ill keep an eye out for a post of your wip version hehe if you need help let me know.
I was having some major problems with baking my high poly to low poly along the smoothed edges.
As you can see the low poly is missing enough edges to match the shape of the high poly, as a result I'm getting missed areas on my normal map bake... which sucks. its pretty much impossible to get a good bake with beveled edges from my high poly to my low, and i needed a solution.
I couldn't find any documentation on this problem anywhere and i had to ask my buddy Konrad to help me solve the problem. Konrad's solution is beautiful in its simplicity. simply take your low poly, and bevel the high hell out of the edge that you want to look beveled and smoothed in your low poly. then use this beveled low poly, for your baking mesh on the edges you need smooth. problem solved.
I know you like to save as many tris as possible, but efficiency is often more important. Plus, adding a few more sides isn't going to hurt that much.
Why make a mountain out of a molehill.
I dunno dude, thats a lot of cylinders to be making have 16-20 sides, and thats the number it would take to reduce that issue until it wasn't very noticable.
With baking from high to low, and avoiding the crappy edges you get, this is what I do:
Add more geometry to the low poly. I'm not sure how to do it in Maya, but in 3dsMax Id just use the Meshsmooth modifier, so it will interpolate between edges and smooth that round area out, but doesn't mess up the UV's.
Then bake your high to your low poly (with added geometry). Once you have your normals, the area with the error that you pointed out in your bake will be less noticable, because the map was baked to a more rounded area, so the UV's were rounder as well.
Then just remove the extra edges from the lowpoly and it should produce a better result.
This typicaly works well with cylindrical shaped objects.
here's the base texture, i of course have to add in the details, and surface detail kinda stuff right now its sort of just where i want to head in regards to color. still gotta add in stuff like rust, and scratches and high frequency noise and of course the spec map.
Here's how the Normal map bake turned out. i wanted to make sure it was nearly impossible to tell the difference between the high and low poly models.
low is in the front, high is in the back.
@stimpack - yea i figgured that out after the first time baking. thats when i realized "... hey I've got a real problem here i need help" haha and ran to my buddy haha. its such a good dirty secret, that i think most artists don't want to share it and keep it to themselves far to often.
@Rang3r1 - that was my first thought to the problem. i wanted to add in more edge loops to the model while keeping the same UV then do a bake, after matching the new poly count to the high... that would take FOREVER and wouldnt' be a practical method in production so i needed a better solution. this one works WAYYyy faster and gets the exact results for minimal effort.
@PredatorGSR - agreed dude thats why your method is da bomb haha.
@gsokol - this was my second solution to the problem, i actually tried something really similar using Zbrush and import crease, it worked, but still gave a lot of errors in the normal map, and wasn't up the the standards i wanted to keep. the method I'm currently using gives FLAWLESS normal map bakes there is no distortion what soever, and it is perfectly seamless. i highly recommend using it as its much faster in production as well since you really don't need to make a high poly model you just have to do a beveled one.
i have the color map basically done still need to tweak a few things then patch up the seams i was gonna show what it looked like with the shaders and stuff, but that doesn't make sense cause the spec maps not done and everything feels kinda dumb without a proper spec map.
(This image is just a flat color so you can see the texture clearly no shader shadows or anything like that)
let me know if you guys see something that looks wrong or stupid and ill fix it.
should have the spec finished by tomorrow. i think I'm going to redo the whole area where the glass with blue liquid is, I've been avoiding it this whole time because i couldn't figure out how to do it i have a good idea now though that should work out nicely.
@Harry - haha don't jinx me man lol there's still plenty of ways for me to screw this up lol
@ZacD - yea i can do one of those when im all done with the model, though i gotta tell you the gun looks a little weird in fps view haha.
Thanks for talking about your bevel trick there- I heard about beveling improving a bake- but never realized that people might bevel JUST to get the bake- and then unbevel afterwards- this might help me with some issues I'm having.
Smoothing groups seems to have a ton of conflicting information. It seems there are people that swear by using different groups for baking and some that say you should only use 1 across the whole model. Hard to tell who's right- people that defend their way are pretty strong about their opinion
I have a tutorial on my website on how you can deal with low poly cylindrical/spherical shapes in my 3d section under tutorials www.custom-airbrsuh.com
Also located on the polycount normalmap wiki
http://wiki.polycount.net/Normal_Map#head-4c2a8da7b1205e71566df74be43b73b02def61ff
Alternatively you don't even have to bevel edges like that, you can simply add more loops using connect since all you need is more normal information...i use this technique all the time, quick and easy
I've got a couple bits and pieces that need some tune ups like the seam on the handle and a couple other areas i think could be punched up but unless you guys see anything that needs a tune up, or that i screwed up on this things next post will be in the finished work section.
do you guys have any recommendations for how to do things like presentations? I'm really bad at doing like cool show off presentations for my work, cause i always just show the model on a plain background and i want to get out of doing that.
@Harry - yea totally i did that for a bit, but i tend to turn it off a lot so i can clearly see what its looking like. a lot of the times ill just drop the color map into the spec channel to have sort of a hacked version hehe. bt for just showing it while its still wip i think its a bad idea to show a hacked map haha. don't want people critiquing something that hasn't even been made properly yet.
@vcortis - haha glad you dig it dude, that problem has bothered me for a while too, tell all your friends how easy it is to fix it.
@OrganizedChaos - yea dude using the beveled model as your new high poly helps SOOooo much. i basically did 2 bakes for the model, one from the high poly, and one from the bevel. then i just erased away the errors of the high poly to reveal the low.... and bingo bango perfect bake with 0 errors.
for smoothing groups on hard surface models it will not work properly unless at every hard edge, you have a new UV island. if you try to bake a hard surface prop with all smooth normals, it doesn't work you'll get a lot of errors and poorly shaded normals, because the normals will interpolate a lot of the data and leave you with big gradients going across your bake... which is a big error. using the bevel trick as a solution to paint out errors so far is the most effective, clean and fast method I've come across i say stick with that one.
@Snader - I'm not quite sure which area your talking about do you mean the trigger guard or the trigger itself?
@airbrush - i think your confused with what the problem the bake was actually having. this wasn't an issue of distortion on a rounded surface where it gets the wavy lines in the bake. its an issue of the normal thats being cast completely missing the surface, and it being geometrically impossible to match one shape to the other in order to get an accurate bake. its literally attempting to make a square peg fit into a round hole. The only real production worthy solution I've ever seen to this issue was the one that Konrad taught me which as far as i know is undocumented anywhere. the solution your tutorial focuses on is a different one all together. adding more loops to the mesh wouldn't solve the issue as it would be impossible(or EXTREMELY difficult and time consuming) to accurately match the low poly edges to the high poly as accurately as the bevel technique does.
I kinda feel like the model isn't hitting hard enough, it kinda feels dull. To be fair, thats how the original reference looks too, but that doesn't mean you can't improve on it. I think the biggest thing is the spec map, you should punch it up a bunch so that some areas are almost being blown out. Basically think of it like taking the levels and compressing them in the screenshot to get greater contrast with the lights and darks. I think having more variation in the spec map would help this a lot, so that the whole model doesn't get blown out, just tiny parts.
The silver parts of the model stick out as especially weak to me, I think improving the spec would take care of it for the most part though. You could probably experiment with making the diffuse color somewhat dark, and blowing out the spec to get the silver metallic look
I think you could improve the rusty areas as well by making the metal more pitted, add the rust texture into the normal map, keep it subtle, but more than what you have. Adding more pitting would give it a more heavy iron feel.
I'm repeating myself now, but I think the main thing that it is lacking is contrast, add in some darker grime in the recesses, add brighter specular highlights on the exposed edges, and bump up the spec and make it more splotchy to get that contrast and depth.
Adding some small lettering into the normal map might be cool, manufacturer, weapon name, stuff like that.
Did you use colored spec? Introducing a hint of red to the rusty areas in the spec map might help some.
and here's the flat texture cause a lot of people have requested to see it.
@PredatorGSR - thanks for the crit again dude youve been a second set of eyes for me the whole time hehe.
Thanks for all the support everybody