[CE] Metroid Prime Gunship WIP
polycounter lvl 4
Hi,
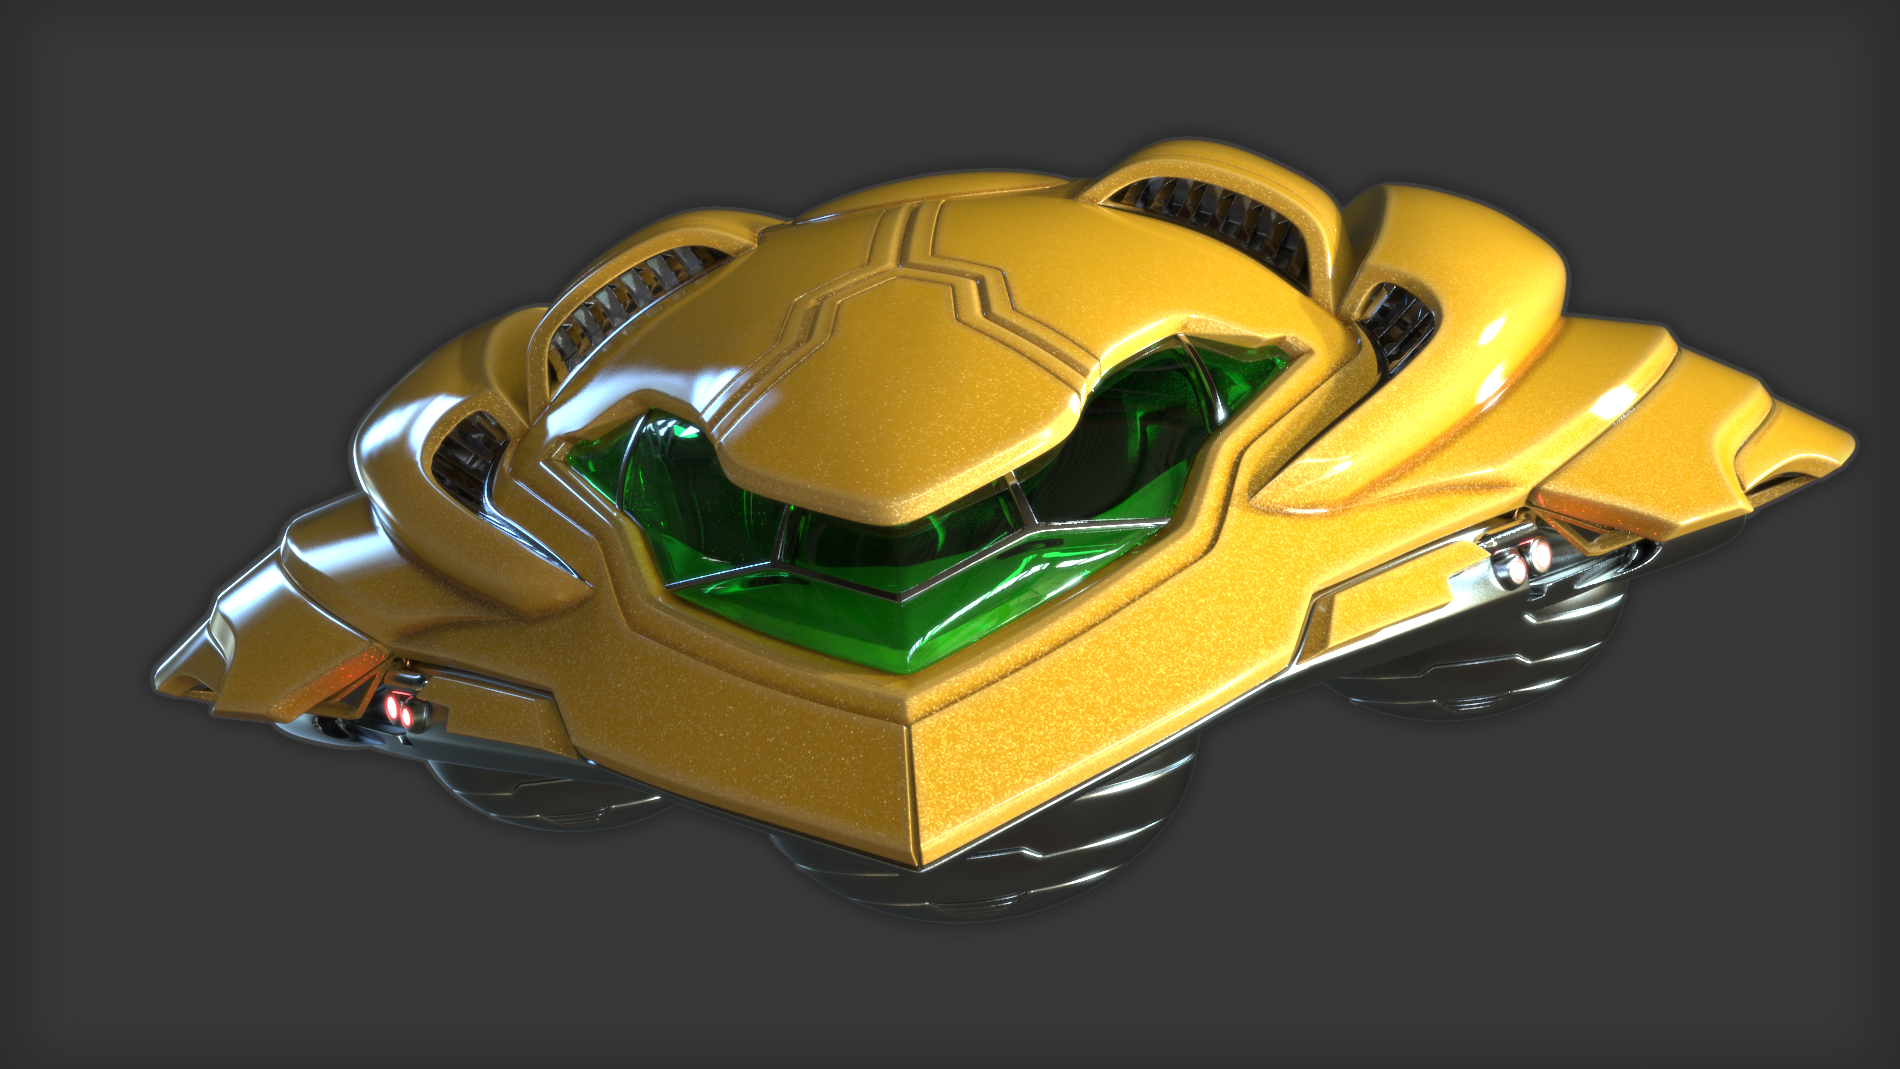
This is meant to become a next-gen version of Samus' Gunship from Metroid Prime 2: Echoes. I own the statue from first4figures, so I thought this would be a good exercise. Now that I'm familiar with the model, I can say that whoever did the physical model got a bit lazy with subD modeling :P

My version is a personal project that has been going on for a few months. I only get to work on it for a few hours every week, so this has been dragging on far too long already! Anyways, pics:
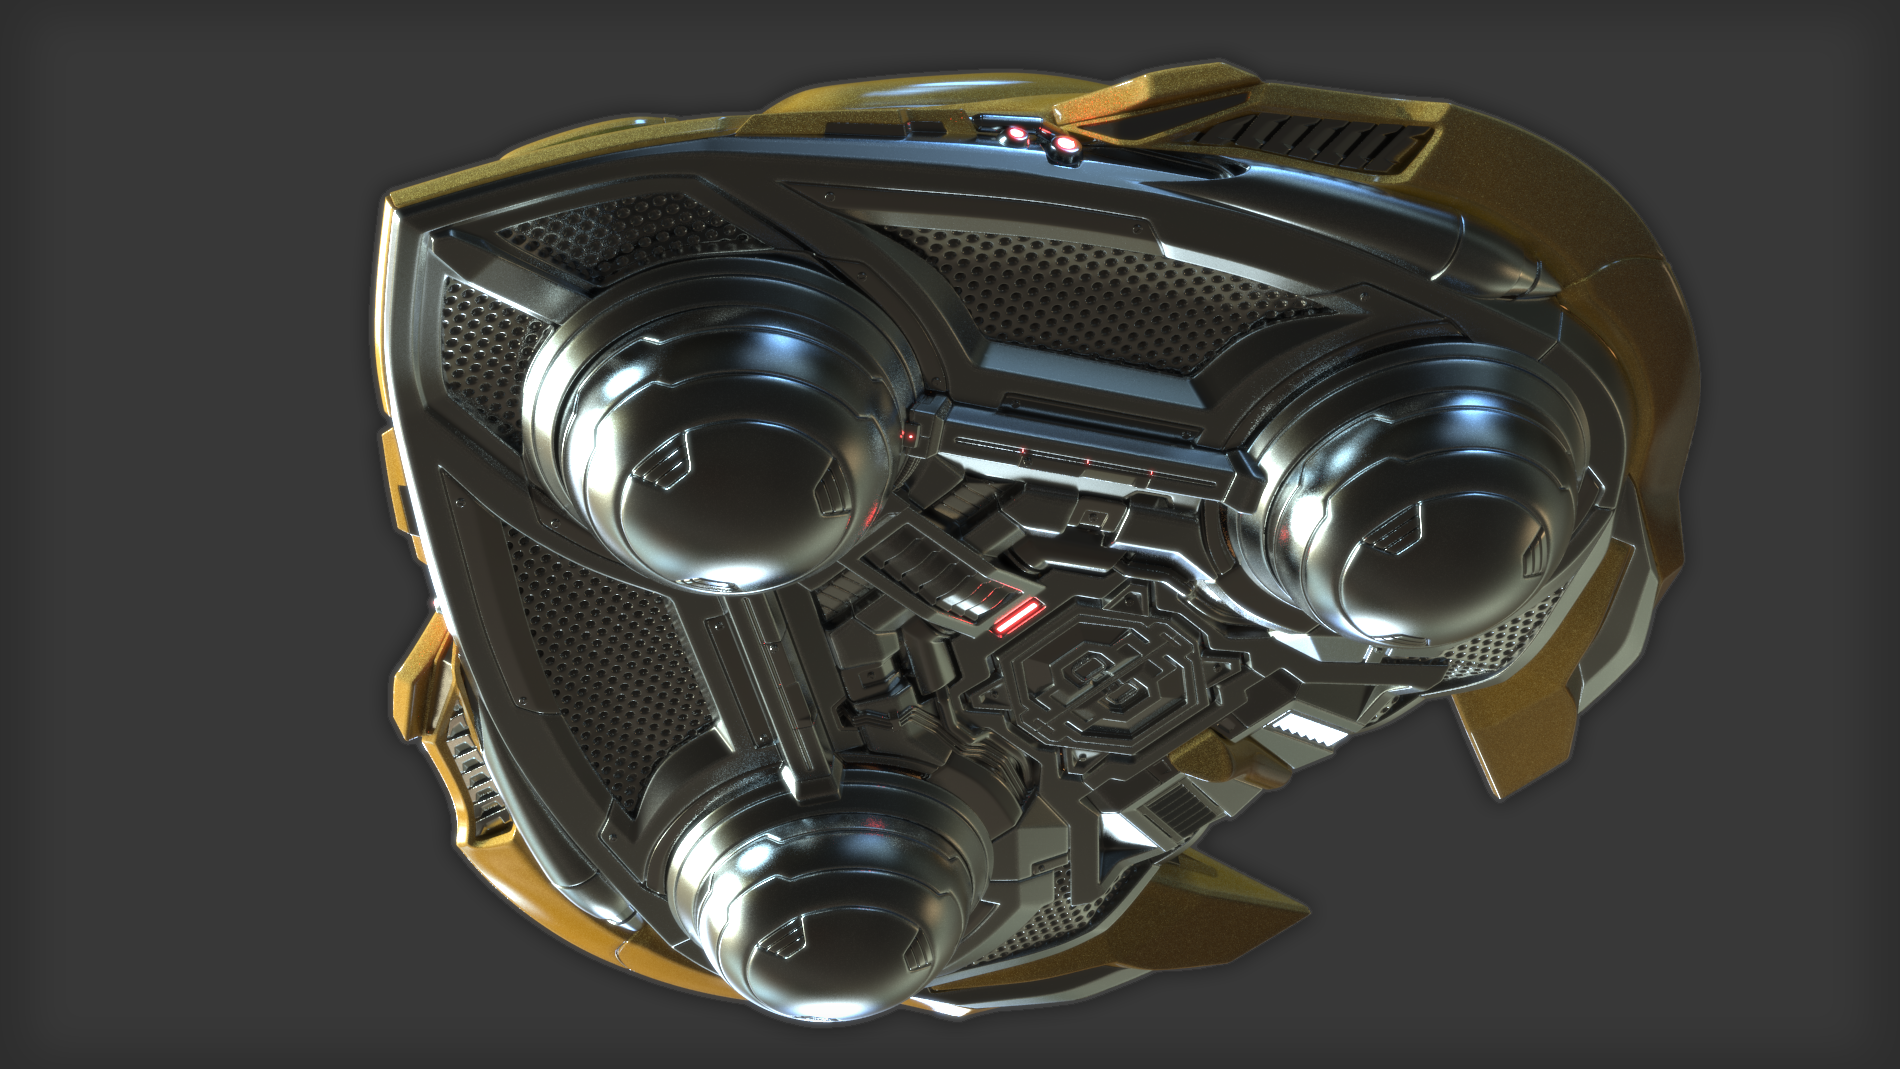
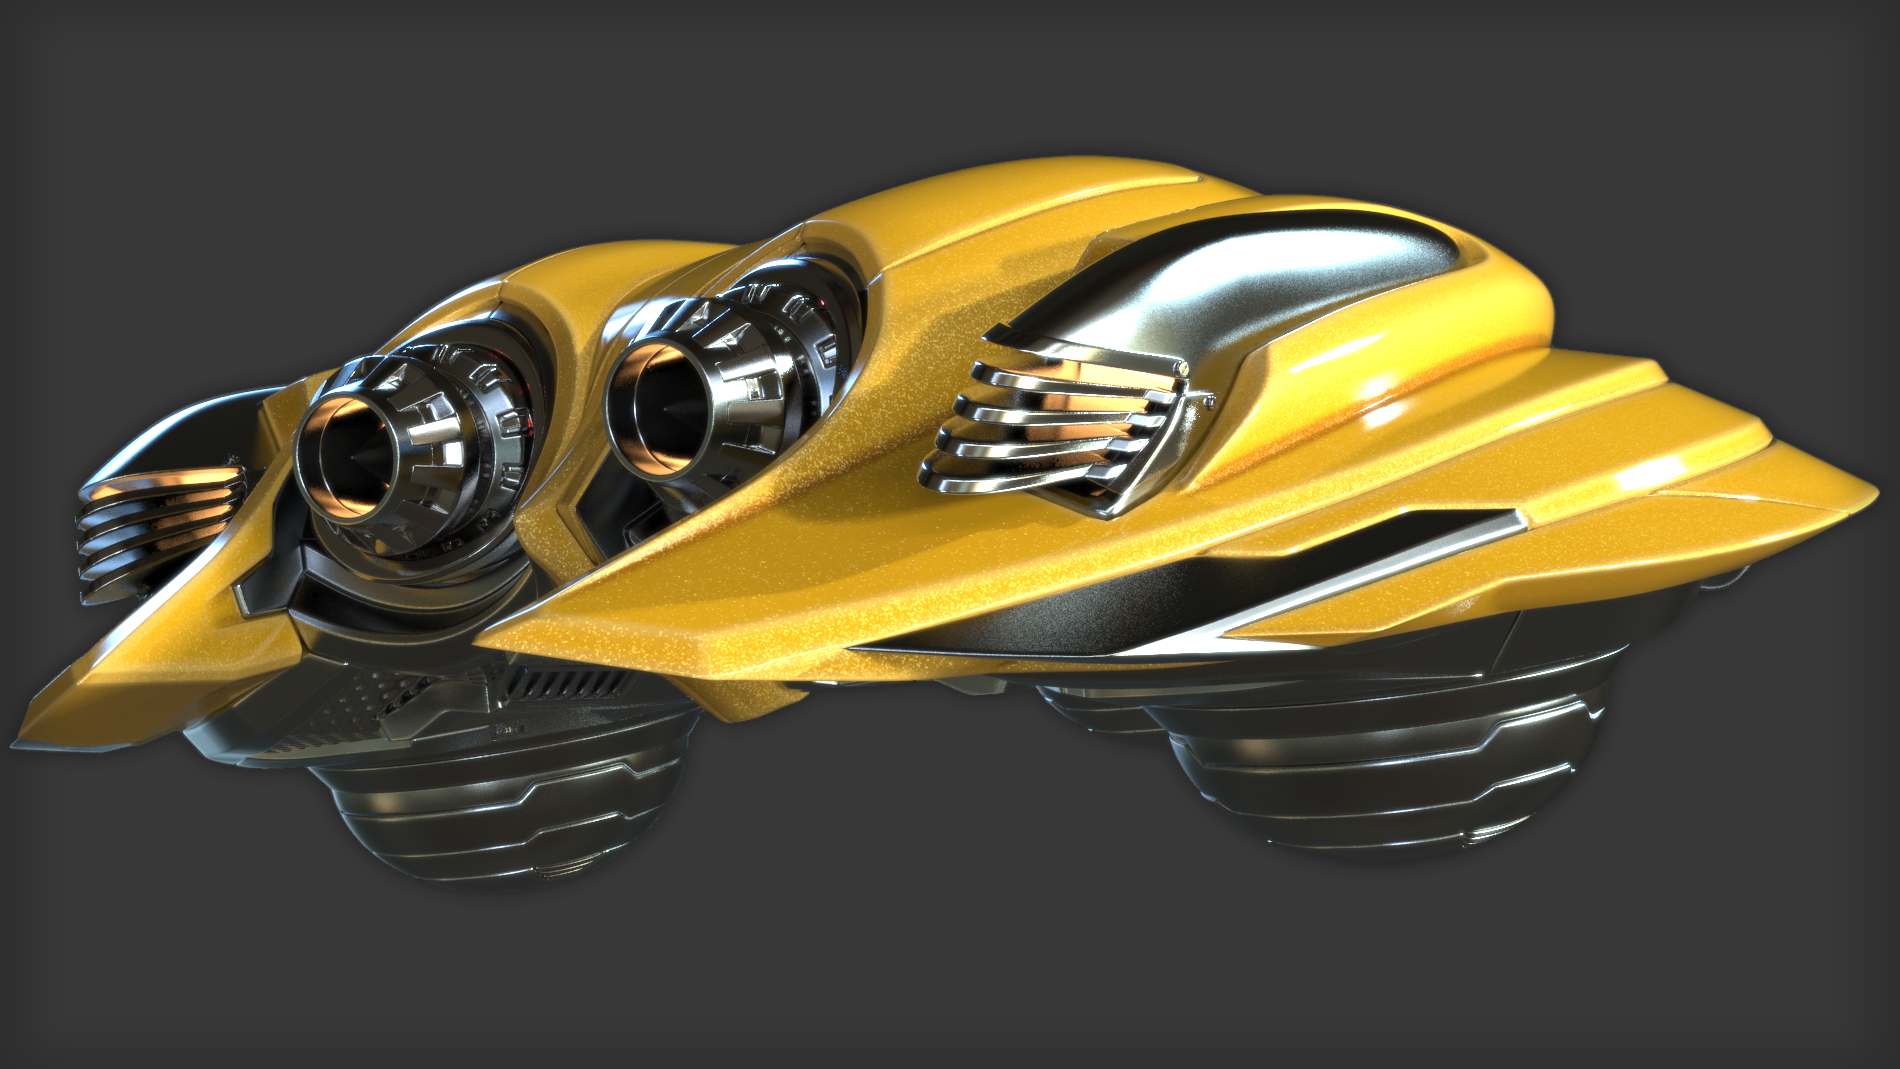
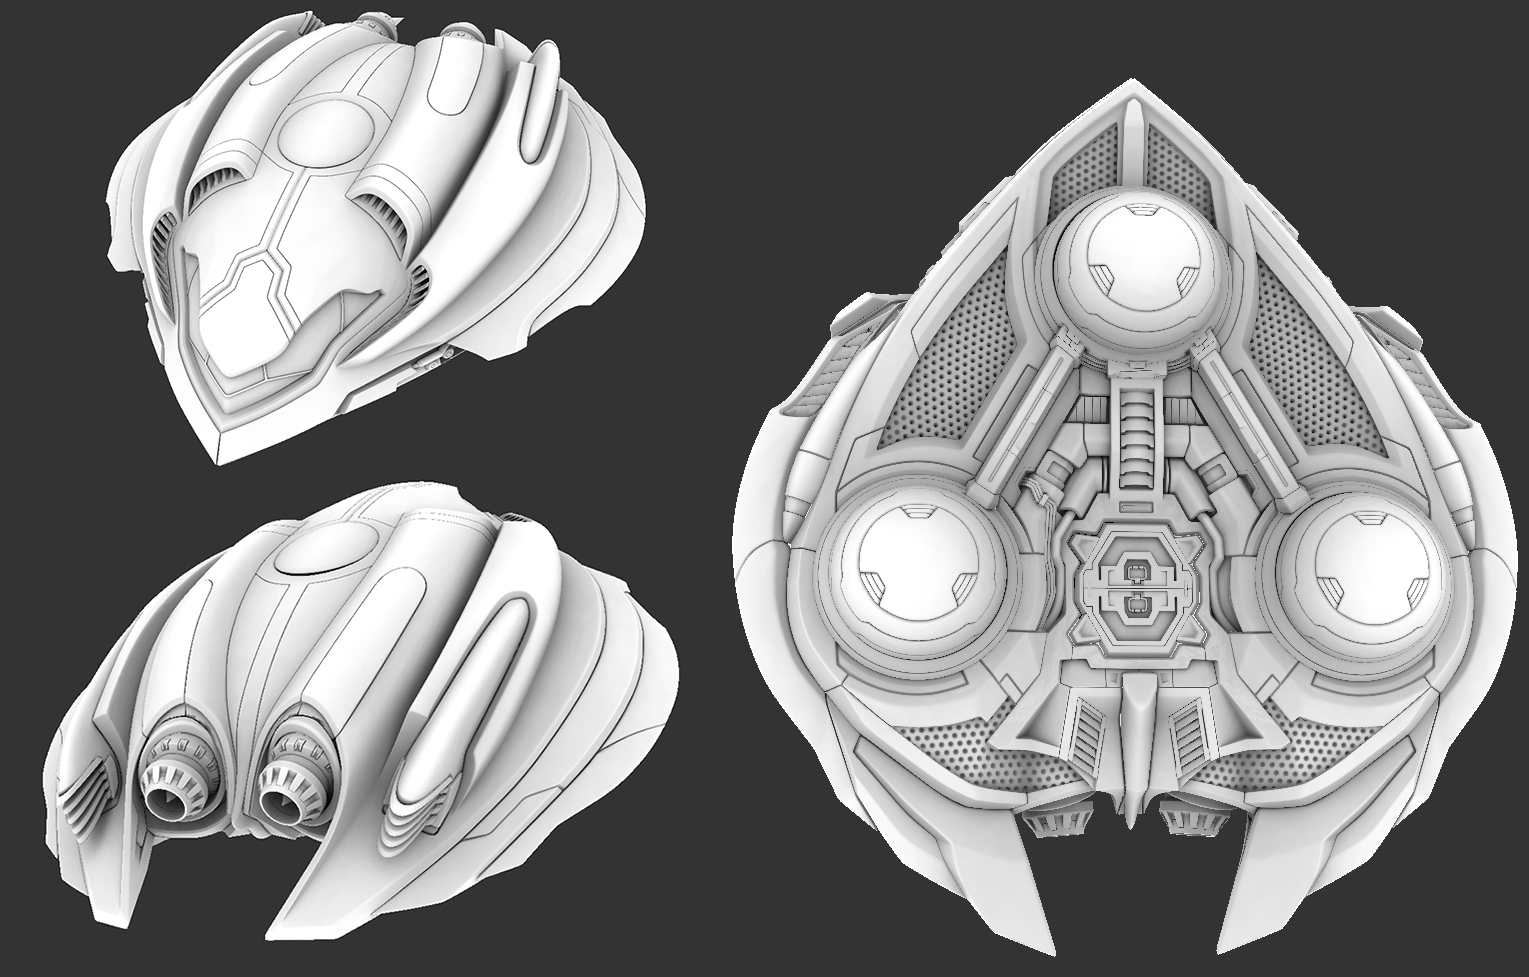
Renders of the highpoly:
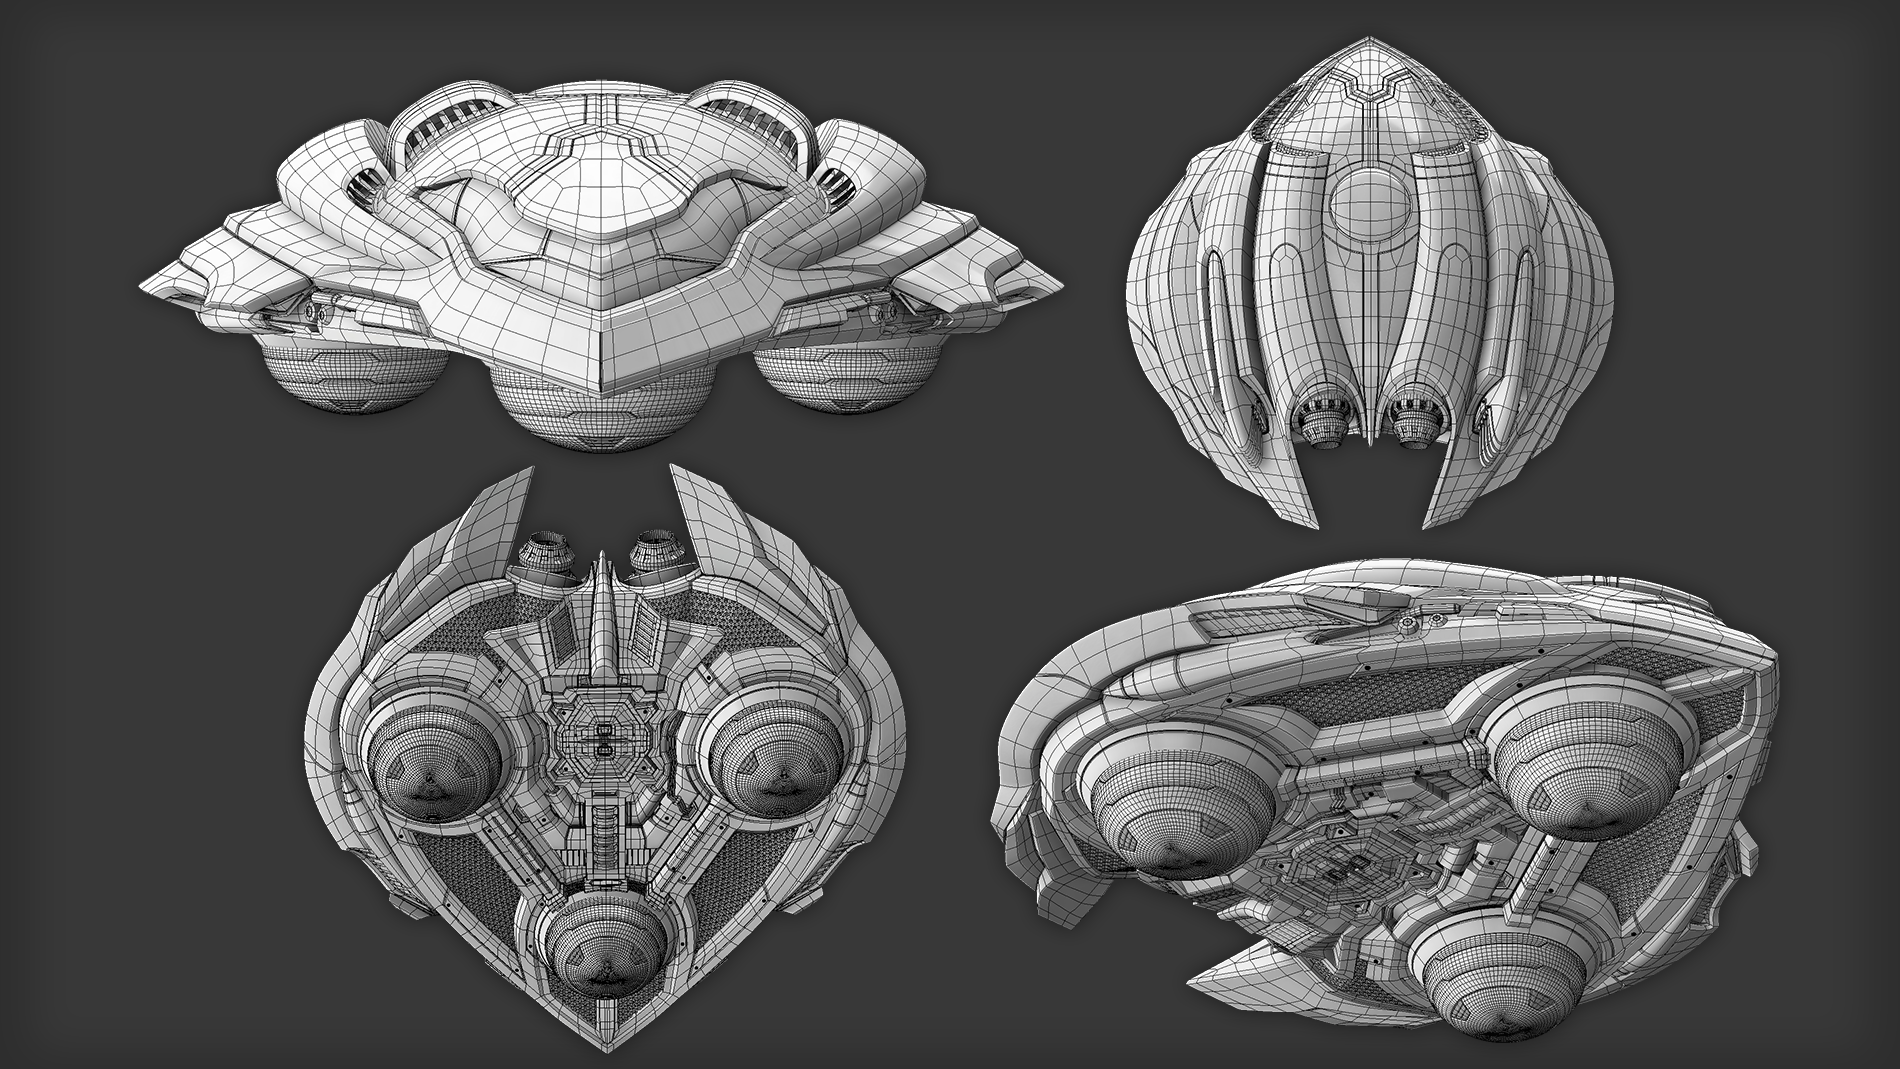
Wires (I am using turbosmooth pro/openSubDiv for this, to explain the lack of control edges)
UVs inside MARI (I've set the symmetrical pieces up with identical UVs offset one patch to the right, so I can use patch linking - basically symmetrized painting with the option to turn symmetry on and off per layer)
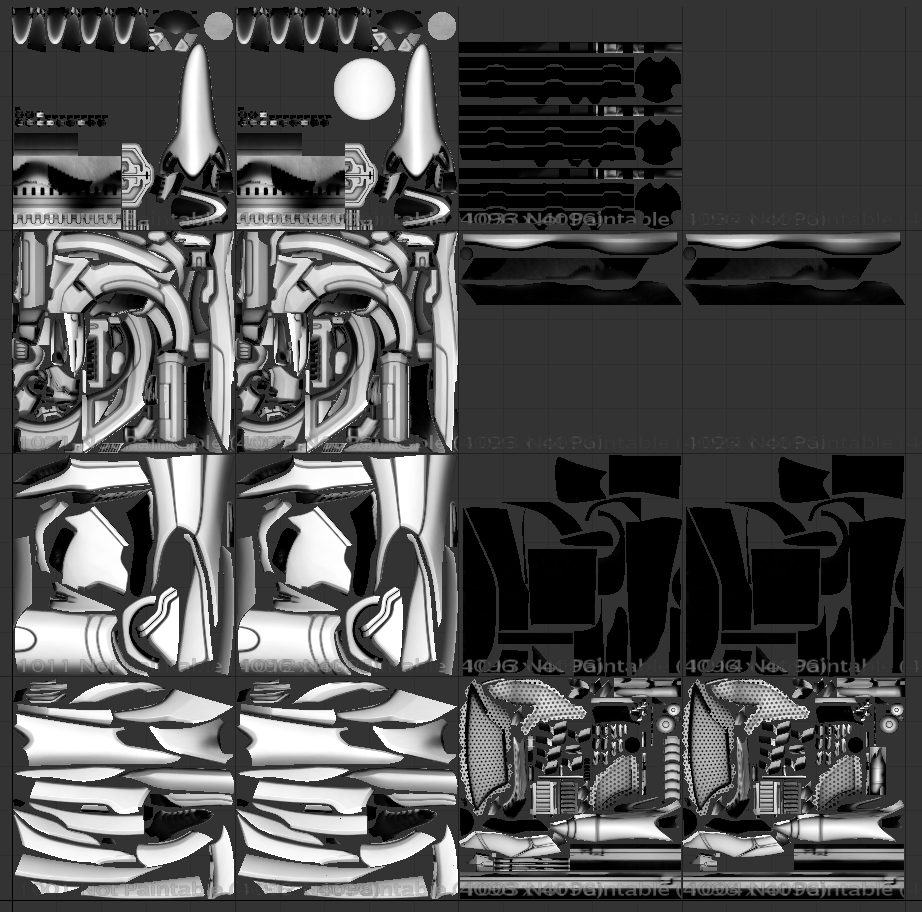
I am at 4x4 patches with a 4096x4096 resolution or 16384x16384:
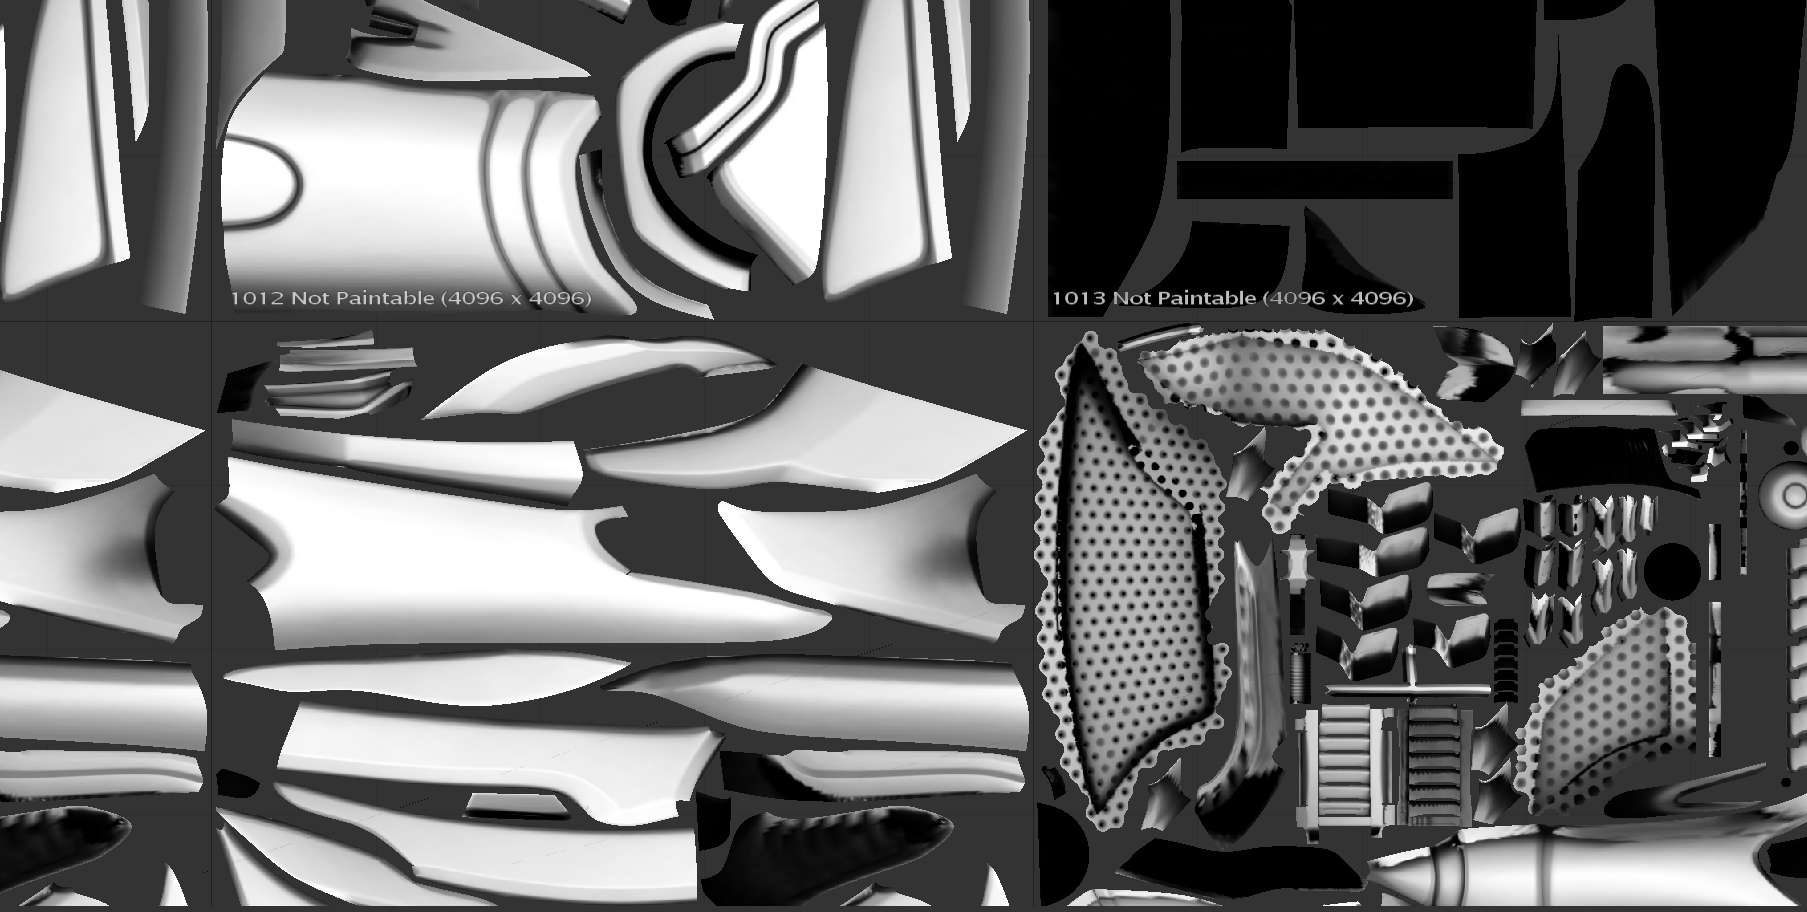
AO inside MARI:
I've wanted to test a few things with this project:
- Modeling a complex model with opensubdiv and see how it holds up in this scenario regarding edge creases, UVs and whatnot
- UVing the highpoly to test opensubdiv, also so I can do some sweet closeup vray renders in the end
- Texturing something big and complex in MARI, also something symmetrical to test UV linking
The plan is to build an in-game version and render it in cryengine, and possibly in UE4 and marmoset for comparison's sake.
Next up: finishing the UVs, then base material setup! Can't wait to start texturing!
This is meant to become a next-gen version of Samus' Gunship from Metroid Prime 2: Echoes. I own the statue from first4figures, so I thought this would be a good exercise. Now that I'm familiar with the model, I can say that whoever did the physical model got a bit lazy with subD modeling :P
My version is a personal project that has been going on for a few months. I only get to work on it for a few hours every week, so this has been dragging on far too long already! Anyways, pics:
Renders of the highpoly:
Wires (I am using turbosmooth pro/openSubDiv for this, to explain the lack of control edges)
UVs inside MARI (I've set the symmetrical pieces up with identical UVs offset one patch to the right, so I can use patch linking - basically symmetrized painting with the option to turn symmetry on and off per layer)
I am at 4x4 patches with a 4096x4096 resolution or 16384x16384:
AO inside MARI:
I've wanted to test a few things with this project:
- Modeling a complex model with opensubdiv and see how it holds up in this scenario regarding edge creases, UVs and whatnot
- UVing the highpoly to test opensubdiv, also so I can do some sweet closeup vray renders in the end
- Texturing something big and complex in MARI, also something symmetrical to test UV linking
The plan is to build an in-game version and render it in cryengine, and possibly in UE4 and marmoset for comparison's sake.
Next up: finishing the UVs, then base material setup! Can't wait to start texturing!
Replies
But it's for the highpoly only. For the in-game, I'm thinking a single 2k or 4k. Better have the resolution and not need it, than need it and not have it. And MARI doesn't really care what resolution you throw at it.
@artquest: I have only briefly tried Uv linking. It seems that you need to specifically activate it for each new layer you create, and it's off by default. This could get pretty annoying, but I guess I can make a script to do it in one click.
Overlapping UVs work as well, but they are a final thing. With linking, I can paint wear and dirt and mirror it, the turn it off and break the symmetry.
Awesome work
I'm actually not sure how much I should push the realistic aspect here. If I want to make it super realistic, I have to add tons of tiny details (both texture and geo) to make the scale read, as the ship would be quite big in real life. But that would probably clash with the cartoonish/gamey shape and proportions of the ship... the original design is based on manga-style drawings.
I'll probably go for a car paint -ish look on the yellow bits with some chunky, readable wear and tear that reveals the bare metal underneath in a few places.
Also set up the metal reveal and spent a few minutes painting it. Hopefully there will be more progress later this week!
Actually, I think the glossiness was too high before. What I have now looks more like metallic car paint, minus the clearcoat layer. I'm going to leave it as it is and then render it with a proper car paint shader. It should look more like in the first pics. If that doesn't work, I can tweak the gloss as you mentioned.
You might be right about the color. I am using three paint materials now, deep orange for cavities, yellow for flat areas and pale yellow for edges. I'll try tweaking them for a more reddish orange.
Also try presenting on a nicer background, a dark purple space background would do very well with the yellow and green. Aside it looks nice
Then, it helps to start with a very rough shape without lots of edgeloops and then later on add them only as needed. If you add too many at once it becomes a pain to keep the geometry clean and the curves tidy. Adding edgeloops with Max's swiftloop (with shift pressed) is a good way to do it.
Other than that, mostly a lot of manual tweaking. Something like this helps with small tweaks while keeping curvature intact: http://www.polycount.com/forum/showthread.php?t=104718
Until then, here's a bit of progress: https://vimeo.com/114397279
edit: eh, vimeo insists in playing it back in full RGB range, crushing the blacks
I'm not sure about the exaggerated curvature roughness. Up close, it looks cartoonish, but at normal distance, I think it's quite nice, and theres a lot of shimmering/business without it.
Some 4k close-ups:
I've also tried adding some major scratches since the existing ones didn't read at a distance. They still need to be de-symmetrized and cleaned up.
As always, c&c welcome! All pics captured from within MARI. There are some white artifacts due to dodgy UVs :S