Questing for the perfect Bake: Max to Zbrush to Xnormal to PS to UDK Workflow Tests
polycounter lvl 6
For a large part of my time working with normal maps I have either accepted baking errors or fixed them by hand in Photoshop.
Now I have decided to finally really dig into the process of baking normal and AO maps using 3DS Max, Zbrush, Xnormal, nDo2 and Photoshop to be displayed in UDK.
My main motivation for this is to push my new personal project further than anything currently on my portfolio. Here is a link to my w.i.p. thread for this enviro:
http://www.polycount.com/forum/showthread.php?p=1914001#post1914001
I have been digging around on the PC forum, talking with industry friends and watching training videos to learn as much as I can this last month.
Here are a few of the things that have really help explain all the options available for baking and how they work.
http://www.polycount.com/forum/showthread.php?t=107196
http://www.polycount.com/forum/showthread.php?t=81154
http://wiki.polycount.com/EnvironmentSculpting
http://eat3d.com/free/xnormal_overview
https://www.3dmotive.com/f105301
[ame="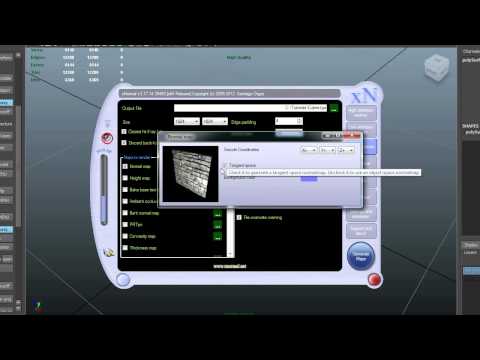 http://www.youtube.com/watch?v=kGszEIT4Kww"]The Fundamentals of Perfect Baking - YouTube[/ame] (A great video tutorial covering most of the above information)
https://www.youtube.com/watch?v=rNgs2DcAsF4 (Tileable Brick Tutorial using Zbrush)
So with that, now I would like to share with you the results of the tests I've done in attempt to complete my quest for a perfect bake. So far, I'm sad to say this is on going. I would really appreciate any and all feedback.
Now I have decided to finally really dig into the process of baking normal and AO maps using 3DS Max, Zbrush, Xnormal, nDo2 and Photoshop to be displayed in UDK.
My main motivation for this is to push my new personal project further than anything currently on my portfolio. Here is a link to my w.i.p. thread for this enviro:
http://www.polycount.com/forum/showthread.php?p=1914001#post1914001
I have been digging around on the PC forum, talking with industry friends and watching training videos to learn as much as I can this last month.
Here are a few of the things that have really help explain all the options available for baking and how they work.
http://www.polycount.com/forum/showthread.php?t=107196
http://www.polycount.com/forum/showthread.php?t=81154
http://wiki.polycount.com/EnvironmentSculpting
http://eat3d.com/free/xnormal_overview
https://www.3dmotive.com/f105301
[ame="
http://www.youtube.com/watch?v=kGszEIT4Kww"]The Fundamentals of Perfect Baking - YouTube[/ame] (A great video tutorial covering most of the above information)https://www.youtube.com/watch?v=rNgs2DcAsF4 (Tileable Brick Tutorial using Zbrush)
So with that, now I would like to share with you the results of the tests I've done in attempt to complete my quest for a perfect bake. So far, I'm sad to say this is on going. I would really appreciate any and all feedback.
Replies
The short answer turned out to be yes.
I flipped Y in Xnormal for my bakes and when exporting from Max.
Flipping the Green channel in the Normal Map will accomplish the same results.
1. Max .obj export for zBrush.
2. ASCII Export for UDK
3. Xnormal General Bake Settings.
4. Xnormal Normal Map Options.
5. Xnormal Ray Tools.
6. Xnormal AO Settings.
7. My cage in Xnormal.
8. Simple UDK Material.
Something close to example "G", but with the edges in examples "E" or "F" would work just fine.
Here are my results being displayed in UDK with their uv's and a small description of the method used. In the top left you can see the HP and LP models used.
Let me know if there is any confusion in the text.
1. Xnormal using harden edges on the LP settings.
2. nDo2 from the harden edges normal map bake (example G.)
Was really hoping to find the sweet spot in the settings to combine the nice even projections of the custom cage from Max with the smooth corners from the Xnormal cage's bake.
Next round I will do a test with the cuts you recommended. Thanks again.
I'm working with some square assets as well, and added in the extra loops to try and get a better bake, which did help tons.
What I started testing this morning was using the normal maps on the original low poly mesh without the extra loops. I don't see any distortion from doing this, so maybe you can try the same approach with this test object?
If you learn how to do it for the worst case scenarios you will have no problem to adapt it to easier problems.
That was my hope, to nail down a process for the 90 degree edges that have given me baking errors for a while now.
Why is it always the parts that appear the simplest end up being the ones that take the most time?
Thanks again Nosslak.
Here were the steps I used for this test:
1. Exported base mesh in Max w/ Zbrush settings option for the .obj exporter.
2. Scuplted HP in Zbrush and exported .obj
3. Reduced down to sub division level 3 and exported another .obj to use for ref in Max.
4. Imported ref .obj and froze it.
5. Adjusted LP mesh and added extra edge loops to solve baking errors and closer match the shape of the HP in game. Used Tex Tools to set Smoothing Groups to UV shells.
6. Exported new LP as an .obj w/ Maya settings for Xnormal and a second as an .ase for UDK.
7. Used the 3D Viewer in Xnormal to adjust the cage and saved it out as a .sbm file.
8. Imported the .sbm to replace my .obj in the LP slot in Xnormal and checked use cage.
9. Baked the normals as Object Space w/ -Y.
10. Converted the Normal Map to Tangent Space w/ Handplane.
11. Tested in UDK
Could you post your UV layout?
Render, left to right - high poly, low poly with extra loops, original low poly.
Wireframe overlaid on render.
Wireframe.
Plenty more to do, time to get back to it.
Looks like your bakes are coming right along as well. Looking pretty clean, not seeing any projection distortion or edge seams on there.
I would be curious to see how the panels would turn out using nDo2. Might be a cool experiment if you have time. Here is a tutorial that demonstrates the hard surface maps you can generate in PS with nDo2.
[ame="
Thanks for uploading those, Erik, I have to admit that's not what I expected to see. I think I've been too literal with the 'hard edge = UV split' guideline from another thread. Your bake looks great from that layout. :thumbup:
I've been resisting digging into nDo2 and dDo until I think I've got a handle on the basic geometry-based pipeline. A lot of things are coming back to me, and a lot more questions are coming up this time around. Actually, one thought today was that my basic pieces are so simple I should just do a common sheet from a simple tiling plane and then map it to the modules. zBrush or more high poly detail is just overkill in some ways. *shrug* I may try it as part of the learning process.
I'll definitely watch that video, though - got to keep packing the knowledge in!