Sketchfab - Uploading Tutorial

polycounter lvl 4
Hello Polycount!
With the launch of the Sketchfab integration on the forum, our guest poster JCSchaeffert has kindly written a tutorial outlining the upload process to Sketchfab, along with an overview of the user interface.
1- Modelling/Baking/Texturing
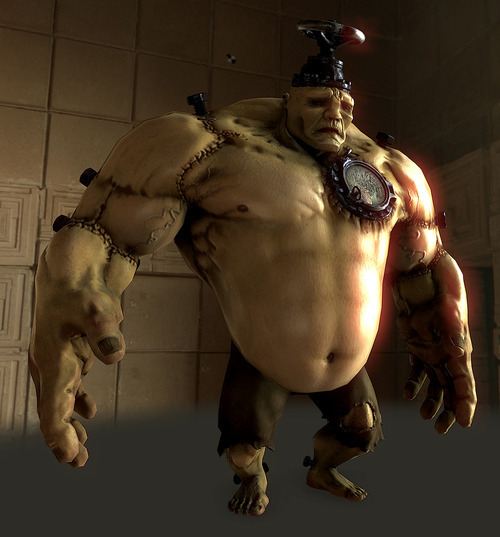
My project was to revisit Frankensteins creature.
First of all, in order to design the character I draw some studies on paper.
Once Im ok with the design I start modeling.
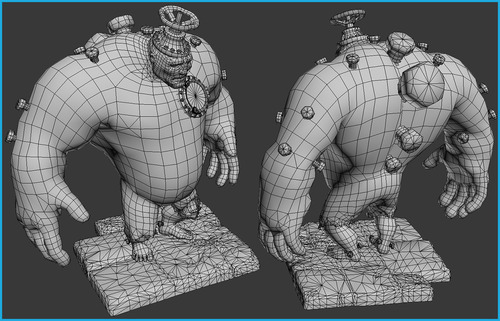
The first step is to create a very light model that I then transform into a very detailed mesh via several subdivisions: this is the sculpting phase.
I also create some separate elements that I will add later on to the model, such as a porthole for his heart, a valve for his brain (O_o) and some screws driven here and there in his body.
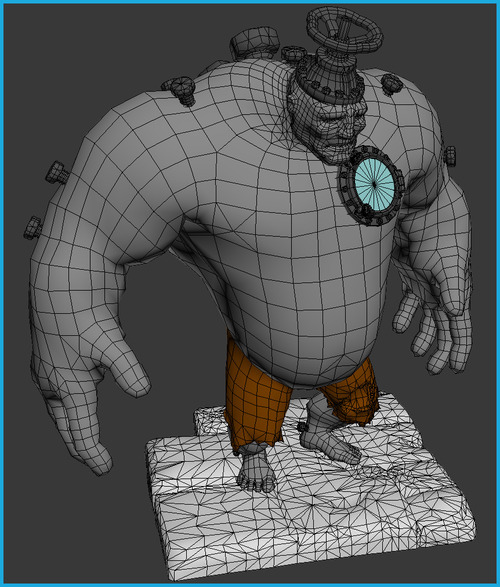
Once the HD model is ready, I start modeling the low-poly version (including unfolded UVs), which is the one I will texture and upload later on.
In order to texture my model, I need to bake the details and color information of the HD model on the low model.
For that I use xNormal, which can generate Normal Maps, AO, cavity maps, etc everything I need in order to add some life to the mesh.
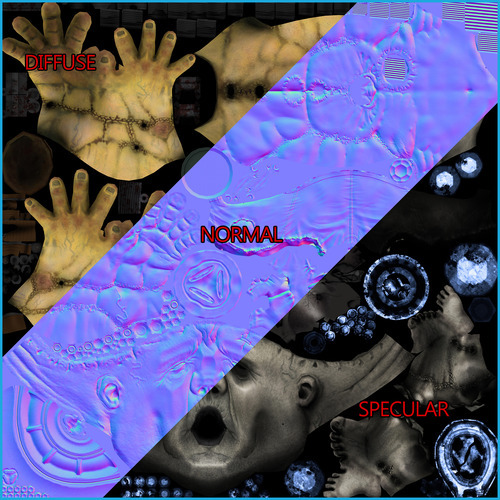
After some refinement and with a little patience, I finally get the following textures:
And I check the whole thing into Marmoset Toolbag:
2-Upload to Sketchfab!
Once the model and the textures are validated, I can upload everything on Sketchfab.
Before that, I need to attribute a different material to each independent part that I want to keep under control for instance, if I want to adjust opacity for one particular part, to have a stronger specular on another part, and so on.
Thats why I identify different zones, such as the porthole glass, the characters skin, the metal parts and finally the base.
Each element now has its assigned material and is identifiable and adjustable in the Sketchfab UI.
Now the model is ready to be exported.
I wont detail here all subtleties of the export phase one thing though: dont forget to export the materials with the model, in our case in .Obj (here you can find all formats supported by Sketchfab: https://sketchfab.com/faq#formats)
Here are some scripts you can use to export from the software to Sketchfab:
https://sketchfab.com/exporters
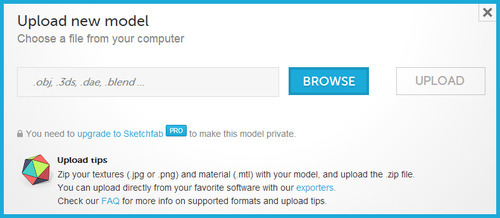
Once you've exported your model successfully, you have to zip the .obj, .mtl and the textures (.jpg or .png) into one file which you also have to upload.
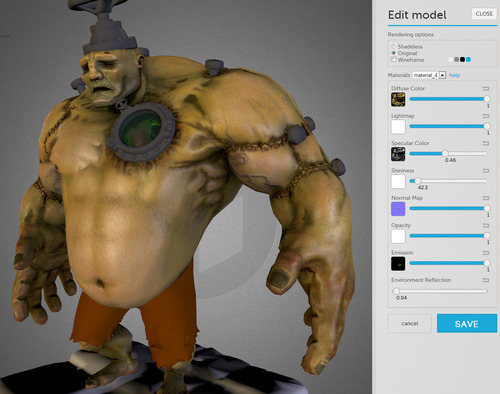
3-Adjusting Materials
In EDIT right pane, I can adjust scene parameters:
- Model / scene name
- Tags
- Model description
- Mesh rotation calibration
- Environment
- Background
- Ambient Occlusion activation
- Finally, adjustment of different materials
Important: dont forget to save your modifications!
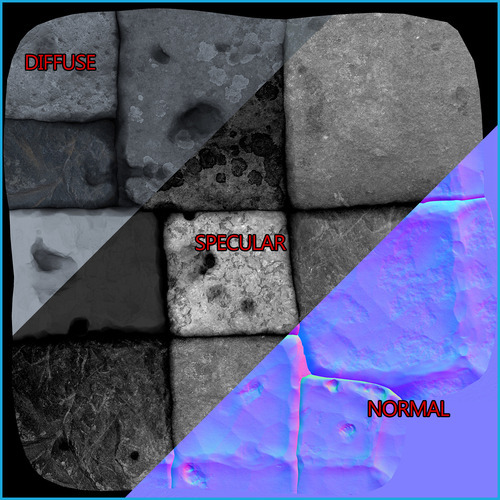
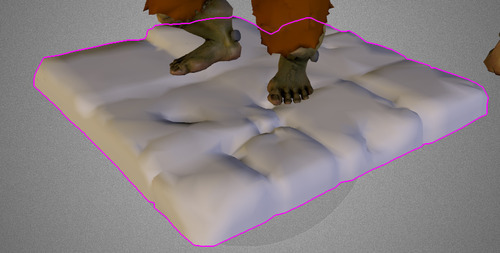
I begin with the stone ground:
I choose the associated material, and I upload textures.
When you choose a material, the associated element is highlighted (with purple)
I upload Diffuse, Specular and Normal maps for the base.
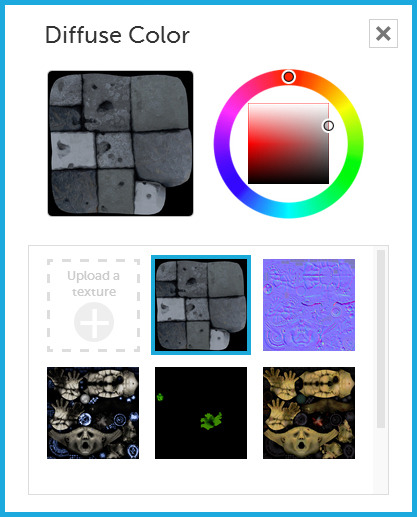
(This window contains all textures loaded into your scene; if you dont attribute a texture, the Color Picker color is used by default)
I adjust shininess in order to get the effect I want, plus a slight environment reflection that adds some wetness to the base. (Now its up to you to play with adjustments to get to what you want!)

Now, to the remaining parts of the model.
Here is the window glass shader:

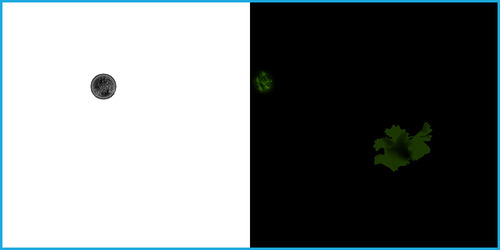
In the Opacity channel, I upload the Alpha map (as seen above Alpha_Emissive_Maps.jpg), containing the transparency information for this part.
On a grey scale, White is opaque and Black is completely transparent.
Then I adjust Shininess and Environment Reflection to get the desired glass effect.
With the skin, since the Diffuse, Normal and Specular maps are the same as before I can get them in my library and attribute them to the associated channels in the skin material.
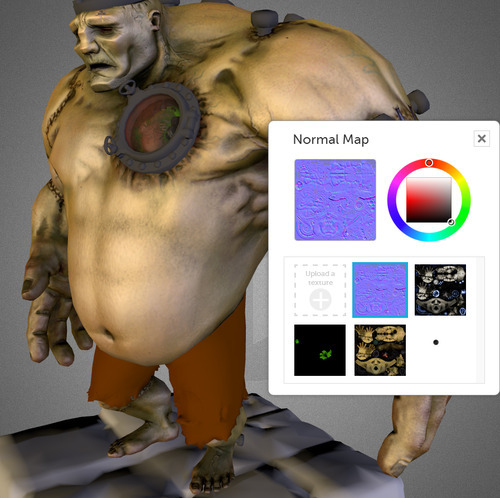
I adjust the Specular and Shininess levels of the skin to make it slightly oily.
Note that I also upload an Emissive map that renders a bright effect at the back of the heart cavity.
You can adjust this channel to your will here I set it at the maximum which is 1.
For the metal parts I repeated the process and selected the associated maps and adjusted the Specular/Shininess/Environment and Reflection maps.
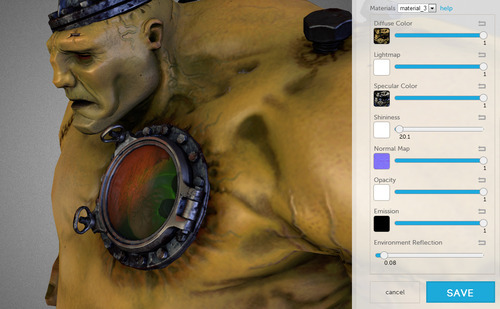
(Check the red environment reflection in the glass!)
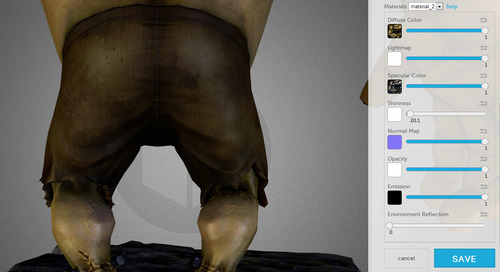
I adjusted the specular differently for the pants in comparison to the skin, and give it a different material.
4-Fine Tuning and Publication
This is it: the home stretch!
Before publishing, you can do some general refinements:
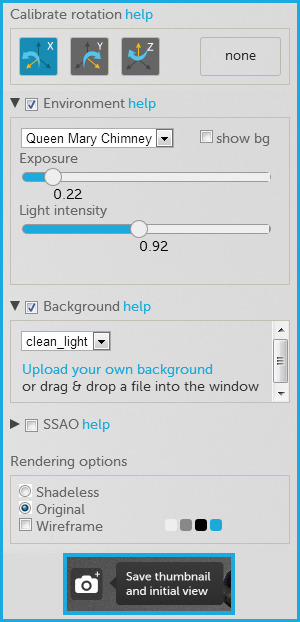
Here, I calibrated the default position of the model.
I use an environment called Queen Mary Chimney, that is visible in reflections but that I've decided to hide in the viewport.
You can also adjust its exposition and intensity.
I've chosen the clean_light Background, which contrasts with the model. You can also import your own background.
By clicking the APN icon (top left of the viewport), you can define a default position as well as a preview.
Finally, do not forget to SAVE your modifications and this will publish your model.
[SKETCHFAB]bYsbh03AJqkeimQ5FMulr5i8yGo[/SKETCHFAB]
We would appreciate any feedback on the tutorial or the Sketchfab service, so feel free to leave your comments in the thread. If you have any problems with your models, you can contact support@sketchfab.com
Thanks
-The Sketchfab Team
Facebook
Twitter
With the launch of the Sketchfab integration on the forum, our guest poster JCSchaeffert has kindly written a tutorial outlining the upload process to Sketchfab, along with an overview of the user interface.
1- Modelling/Baking/Texturing
My project was to revisit Frankensteins creature.
First of all, in order to design the character I draw some studies on paper.
Once Im ok with the design I start modeling.
The first step is to create a very light model that I then transform into a very detailed mesh via several subdivisions: this is the sculpting phase.
I also create some separate elements that I will add later on to the model, such as a porthole for his heart, a valve for his brain (O_o) and some screws driven here and there in his body.
Once the HD model is ready, I start modeling the low-poly version (including unfolded UVs), which is the one I will texture and upload later on.
In order to texture my model, I need to bake the details and color information of the HD model on the low model.
For that I use xNormal, which can generate Normal Maps, AO, cavity maps, etc everything I need in order to add some life to the mesh.
After some refinement and with a little patience, I finally get the following textures:
And I check the whole thing into Marmoset Toolbag:
2-Upload to Sketchfab!
Once the model and the textures are validated, I can upload everything on Sketchfab.
Before that, I need to attribute a different material to each independent part that I want to keep under control for instance, if I want to adjust opacity for one particular part, to have a stronger specular on another part, and so on.
Thats why I identify different zones, such as the porthole glass, the characters skin, the metal parts and finally the base.
Each element now has its assigned material and is identifiable and adjustable in the Sketchfab UI.
Now the model is ready to be exported.
I wont detail here all subtleties of the export phase one thing though: dont forget to export the materials with the model, in our case in .Obj (here you can find all formats supported by Sketchfab: https://sketchfab.com/faq#formats)
Here are some scripts you can use to export from the software to Sketchfab:
https://sketchfab.com/exporters
Once you've exported your model successfully, you have to zip the .obj, .mtl and the textures (.jpg or .png) into one file which you also have to upload.
3-Adjusting Materials
In EDIT right pane, I can adjust scene parameters:
- Model / scene name
- Tags
- Model description
- Mesh rotation calibration
- Environment
- Background
- Ambient Occlusion activation
- Finally, adjustment of different materials
Important: dont forget to save your modifications!
I begin with the stone ground:
I choose the associated material, and I upload textures.
When you choose a material, the associated element is highlighted (with purple)
I upload Diffuse, Specular and Normal maps for the base.
(This window contains all textures loaded into your scene; if you dont attribute a texture, the Color Picker color is used by default)
I adjust shininess in order to get the effect I want, plus a slight environment reflection that adds some wetness to the base. (Now its up to you to play with adjustments to get to what you want!)
Now, to the remaining parts of the model.
Here is the window glass shader:
In the Opacity channel, I upload the Alpha map (as seen above Alpha_Emissive_Maps.jpg), containing the transparency information for this part.
On a grey scale, White is opaque and Black is completely transparent.
Then I adjust Shininess and Environment Reflection to get the desired glass effect.
With the skin, since the Diffuse, Normal and Specular maps are the same as before I can get them in my library and attribute them to the associated channels in the skin material.
I adjust the Specular and Shininess levels of the skin to make it slightly oily.
Note that I also upload an Emissive map that renders a bright effect at the back of the heart cavity.
You can adjust this channel to your will here I set it at the maximum which is 1.
For the metal parts I repeated the process and selected the associated maps and adjusted the Specular/Shininess/Environment and Reflection maps.
(Check the red environment reflection in the glass!)
I adjusted the specular differently for the pants in comparison to the skin, and give it a different material.
4-Fine Tuning and Publication
This is it: the home stretch!
Before publishing, you can do some general refinements:
Here, I calibrated the default position of the model.
I use an environment called Queen Mary Chimney, that is visible in reflections but that I've decided to hide in the viewport.
You can also adjust its exposition and intensity.
I've chosen the clean_light Background, which contrasts with the model. You can also import your own background.
By clicking the APN icon (top left of the viewport), you can define a default position as well as a preview.
Finally, do not forget to SAVE your modifications and this will publish your model.
[SKETCHFAB]bYsbh03AJqkeimQ5FMulr5i8yGo[/SKETCHFAB]
We would appreciate any feedback on the tutorial or the Sketchfab service, so feel free to leave your comments in the thread. If you have any problems with your models, you can contact support@sketchfab.com
Thanks
-The Sketchfab Team
Replies
I find that if you decided to update a texture file for a piece you will end up having more than one, unless I am missing an option I do not see a way of clearing out unused textures from the materials section. Other than deleting the entire thing just to clean up a situation regarding a texture.
Any help with this staff? I would appreciate a response as I tried to look through your FAQ and didn't see anything about this and am surprised no one brought up the issue.
Thanks!
Being about to rotate, spin around, observe real world elements quickly in web browser brings so much to understanding relations between elements and proportions.
Same goes with dropping these models in your modeling viewport as reference/geometry support etc. I wish I had that when I first started out with 3D!
If you were to spawn in a (not all, bust most) video games world, you would realize, for the most, that they feel like a Disneyland set, partly due to modularity. Observing geometry reconstructed from real life scans really helps so much when modeling everything unique
Even with the best game-ready scans library, you still need a lot of comprehension about where and how to place them to imitate some real location ..it's very difficult.. so easing ways to observe from all angles really do help