Dragon Model for Dissertation, Feedback Appreciated
I am modelling a dragon for my final year dissertation and have already created the concept for modelling and texturing reference.
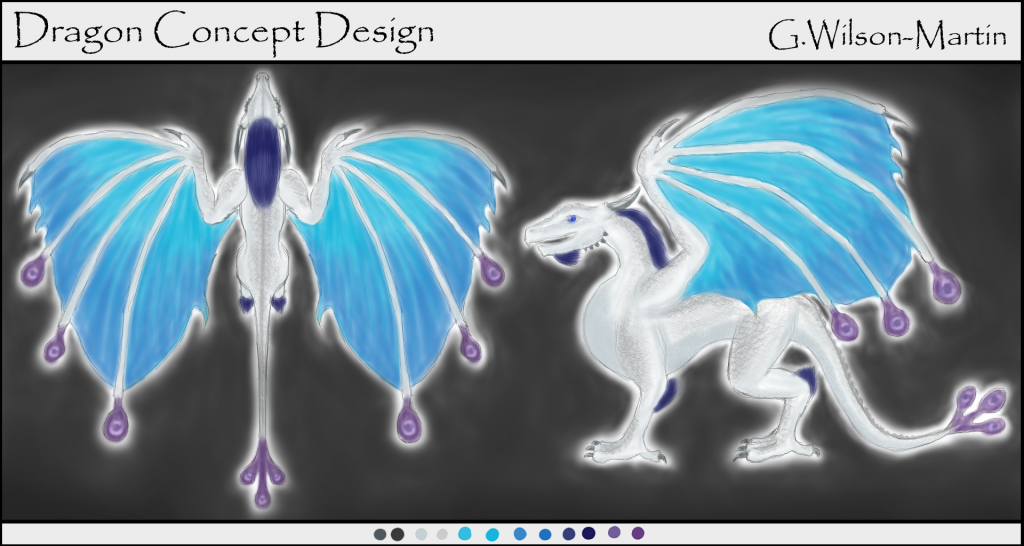
So far my modelling progress is as follows, makign use of symmetry and Mesh Smooth:
Blocking out and shaping the body
Adding in and shaping limbs and neck
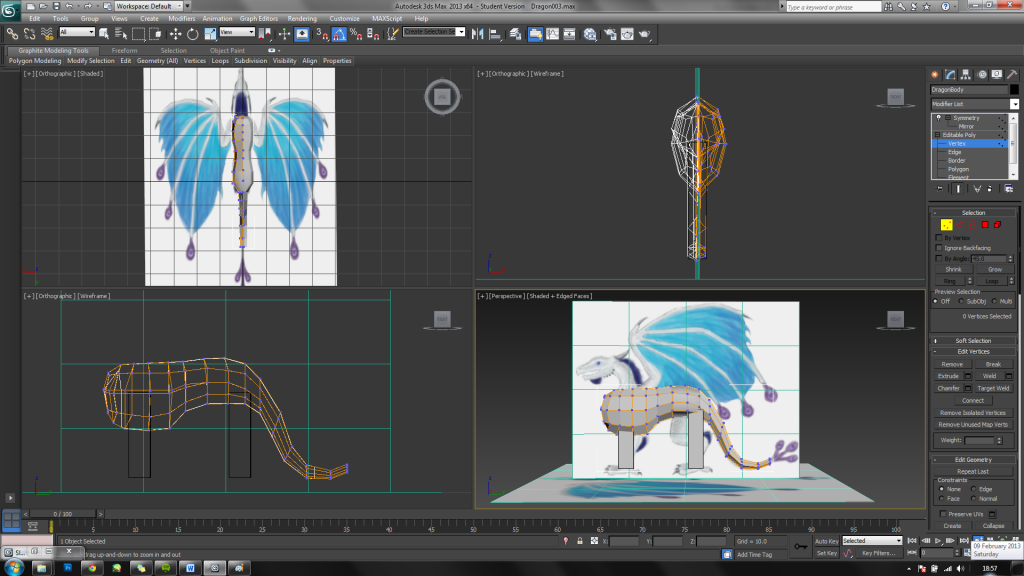
Attaching legs and adding wing
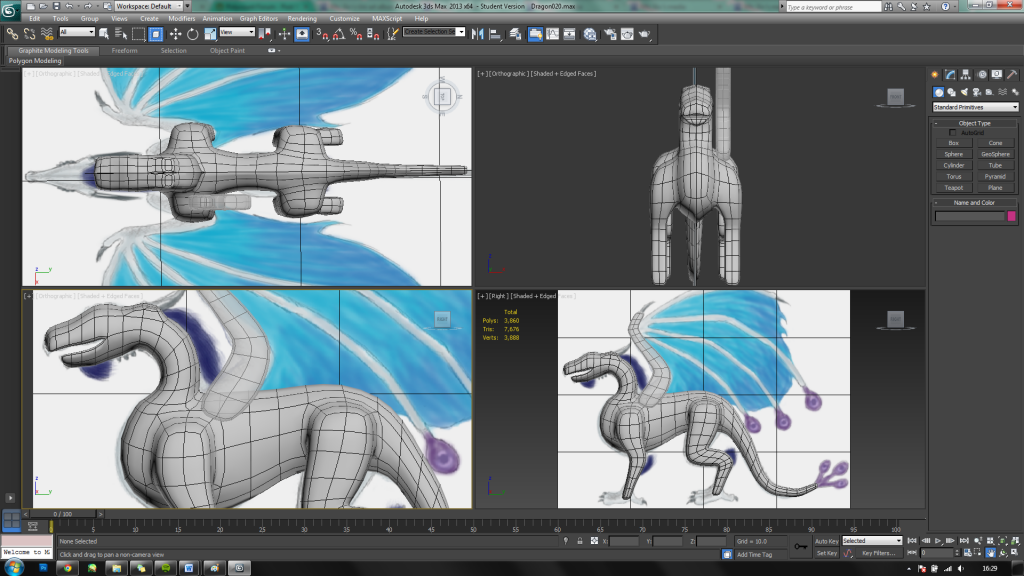
(Without ref)
At this last stage I also removed the horns, as I wanted to add a further loop down the body and to create the horns, claws etc. as separate, harder edged objects.
I hope to finish the wing and to start refining the finer details such as the claws, face and tail soon.
Any suggestions or other feedback is appreciated")
So far my modelling progress is as follows, makign use of symmetry and Mesh Smooth:
Blocking out and shaping the body
Adding in and shaping limbs and neck
Attaching legs and adding wing
(Without ref)
At this last stage I also removed the horns, as I wanted to add a further loop down the body and to create the horns, claws etc. as separate, harder edged objects.
I hope to finish the wing and to start refining the finer details such as the claws, face and tail soon.
Any suggestions or other feedback is appreciated
Replies
Dragon 1
Dragon 2
It might help to get some basic knowledge of anatomy (dinosaurs/dogs/horses/cats) This will help to visualize the beast in question better.
Look up some creature design tutorials of FZD http://www.youtube.com/user/FZDSCHOOL
Just listen to what he tells and give it a try yourself
Good luck!
Man didn't know that tutorial it's awesome thanks
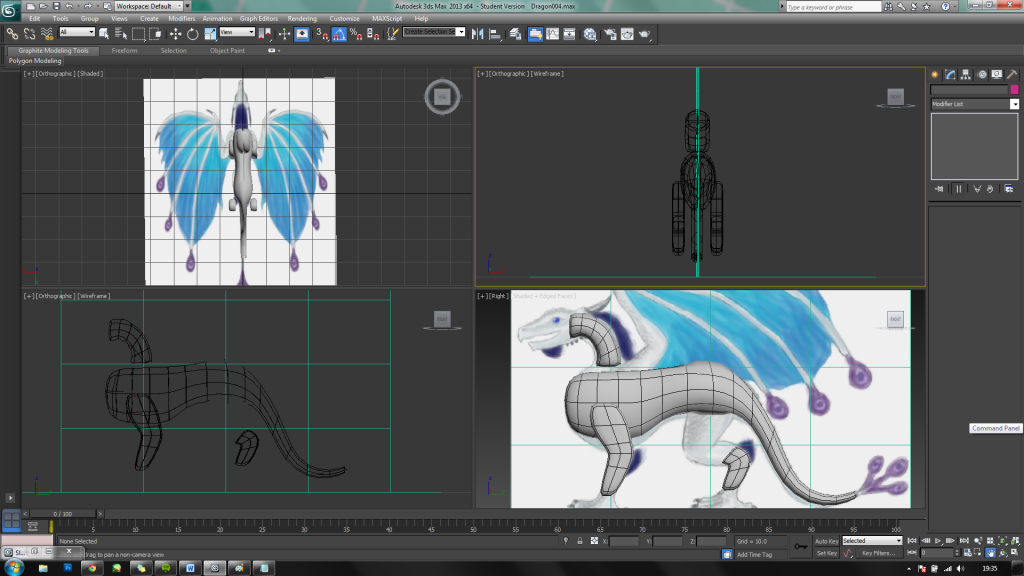
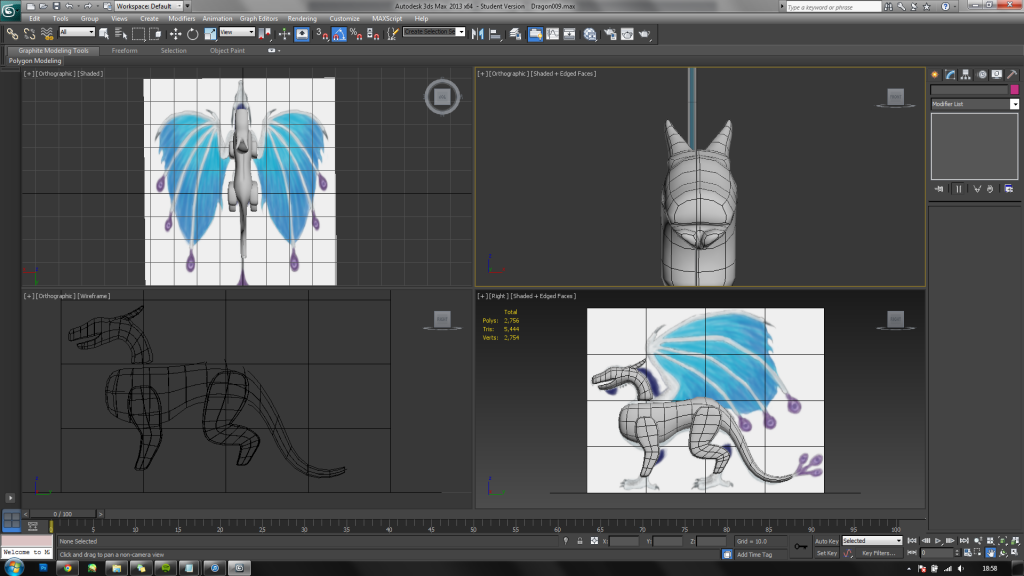
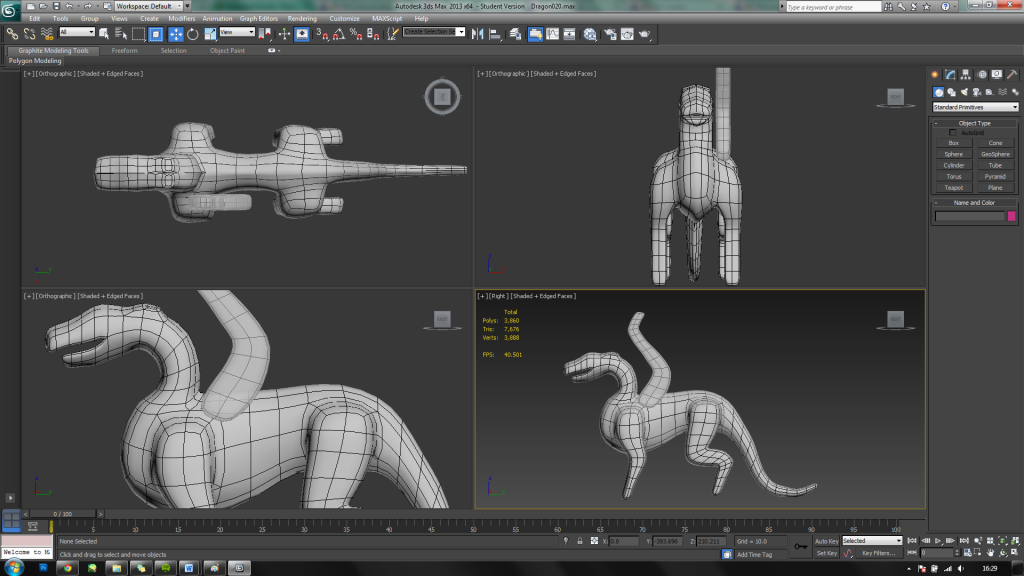
As for the model progess, I've the added with the feet and wings as well as finer details such as horns, claws, eyes and nostrils and am now planning out the wing membranes and other embellishments. I am thinking of adjusting the wing 'fingers' to be more spread out and also rotated at an angle before I attach them.
Next I started to shape the membranes from planes.
I will add more loops into the membranes and hope to have the wings finished, attached and rotated soon.
EDIT:
I realised the top membrane and finger were uneven so I've just fixed that. I also forgot to mention I will be adding the feathers at the ends of each finger.
Base Mesh Updates
Here are a few screenshots of the dragon in Zbrush after initial sculpting. More has been done since so I shall upload more screenshots as soon as possible, as I've had some recent trouble with the software.
Initial HP sculpts
I've still got some alpha transitions between areas like the chest and the spine to perfect and I want to improve the colour variation on his body.
(Without subtools, so you can see the back better)
I painted the recesses using cavity masking and started adding a mottling of colour variation into the main base colour, as the white and greys looked too plain. For example, I added some skin tone around the softer areas of the head and around the feet and general blue and green mottling throughout. I also tried to define the transition between the belly and main body with further alphas and polyapinting.
Sculpt
Polypaint on Flat Colour Material
Sculpt with Polypaint applied
First of all I want to address your concept. It's a fine place to start with a concept like that, but I feel like you should have made a greater push to follow up with more anatomical reference once you started your sculpt. Even in the concept you have these breaks in scale detail from the front and back of the legs. That at least helps provide a stopping point in visual detail. Right now you have this very uniform detail everywhere that prevents the eye from resting.
Another point is your anatomy and form. You've done a good job echoing your concept in essence, but it's still missing any realistic musculature and bone structure. Your forms are a little segmented and I don't see much as far as insertion points for your joints.
Finally I wanted to mention the fine detailing in your sculpt. The scale detail you have looks decent and reads as scales, but as I said before is too even throughout and you don't get a break from it. It seems like a lot of it was just a form build up in order to be a placeholder for a scale later on but don't actually reference scale forms. For instance, take the ring of detail from the nose circling the eye. It's this nice little visual break because of the size and color change, but the design itself could use work. Really try to push the detail that the scales are actually protruding and overlapping rather than just brushing them on over and over and over again.
Overall, I'd say that you should finish this and move on to something better. Unfortunately, regardless of style choice, it shows a lack of understanding on multiple fronts that will not flatter you as an artist. I would say before you attempt a model like this again, you really need to put some time into serious anatomy sculpting from reference. Do some form studies! Gestures! Don't be afraid to look at reference. The only way you can improve is by applying that real world knowledge. If this was for a dissertation I would honestly probably fail you, but that's okay! It's a start and that's what is important. Next time just make sure you're prepared.
I appreciate the amount of advice you have given me though, as I can certainly take the time now to make improvements to the project now that the deadlines have passed. For example, I would like to revisit the scale details you've mentioned and make them much larger and therefore make the transitions between them more obvious and less uniform.
For now at least, here is the dragon model that I handed in, both as is and posed with a particle effect. (I included the animated particle effect in the video to show how it works. I plan to animate the dragon as well, seeing as it is rigged, but I accidentally moved one of the bones instead of keyframing it so I will have to fix the rig before I can export the animations.
http://www.youtube.com/watch?v=C9mOdB20WHQ