The BRAWL² Tournament Challenge has been announced!
It starts May 12, and ends Oct 17. Let's see what you got!
https://polycount.com/discussion/237047/the-brawl²-tournament
It starts May 12, and ends Oct 17. Let's see what you got!
https://polycount.com/discussion/237047/the-brawl²-tournament
Making of Stylized Snowy Fort Art Test Model - WARNING: Image heavy
polycounter lvl 10
To make this clear - this is an art test I completed and turned in a week ago.
The purpose of this thread is to show the thing off, show the stages of progress, perhaps help people learn to do it, and maybe get some tips for doing it better next time.
Hey there Polycount, just posting some WIP screens of this art test I did recently. Its totally not new information but maybe it will help someone")
First off, props to those who came before and taught me:
Thank you Jason Lavoie (jasonlavoie.net), racer445 (racer445.com), and Adam Brommell(adambromell.com) for spreading the love via your post mortems/wips/tutorials. I'll just be lurking here sucking up everything you teach us
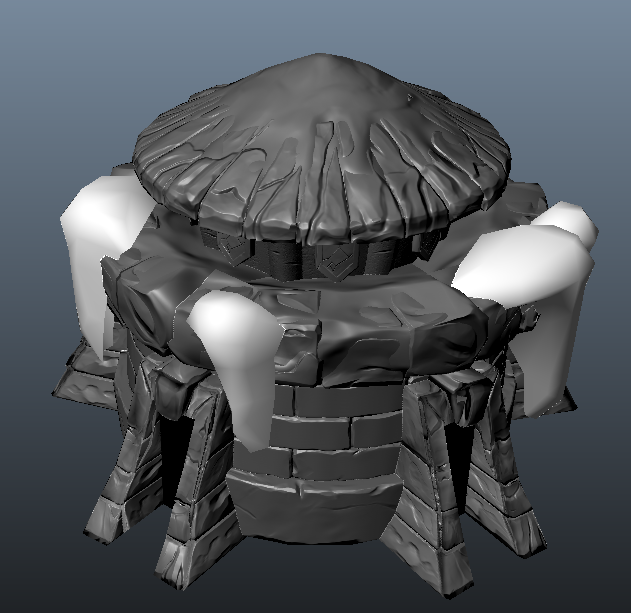
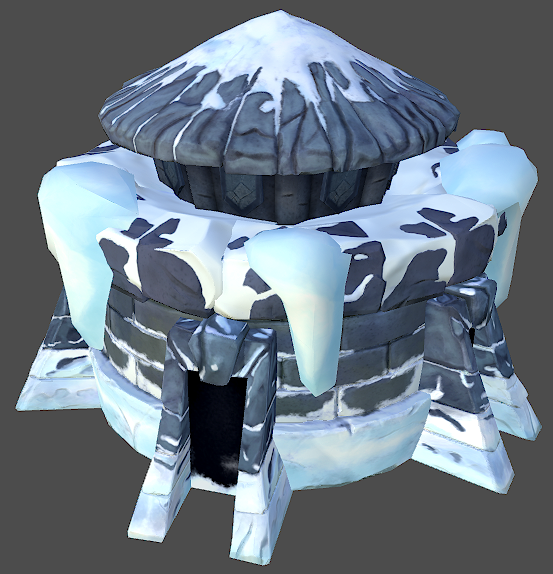
The subject of the art test was to update the pictured low poly asset with a fully sculpted normal + spec + diffuse at 1024 resolution. I was asked to do the snowy version:
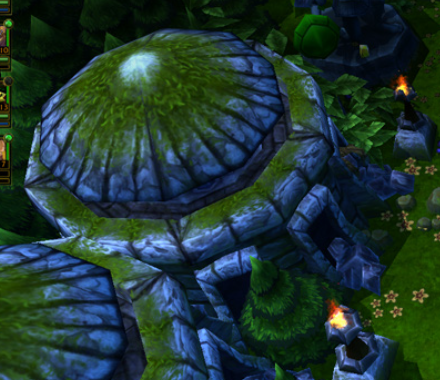

The first thing I did was collect reference and do some sketches to determine how I would approach this thing. I also downloaded some tools to rip out and get a look at the game's original textures which gave me an idea of the texture style (Blizzardish).
Then I came up with some very simple cube meshes in 3dsMax, then exported them to ZBrush. I did do some simple UV'ing so I could break the mesh into polygroups once inside ZBrush.
The first part I sculpted was the base brick wall. I did a quarter of the cylindrical base of the wall, focusing on broad details. I knew that when I textured this thing I didn't want a ton of high frequency noise in the texture interfering with the paint strokes:
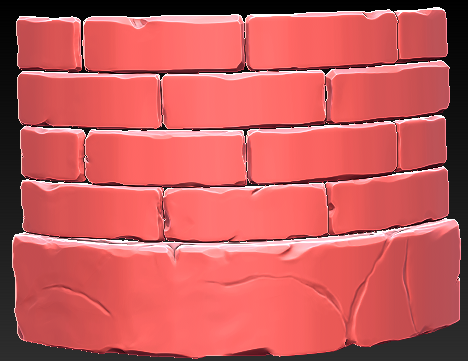
I continued on this way, focusing more detail toward the top of the model because the model was intended to be viewed from a top-down strategy game angle:
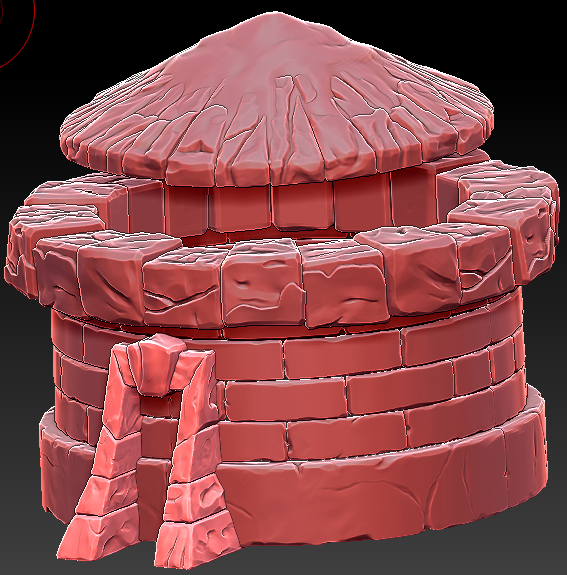
I ended up layering snow onto the base stones exclusively in ZBrush by appending poly cubes to my tool then moving them around. This is how I added snow to the roof and turret.
Once I was satisfied with the high poly, I decimated it and imported it into Maya where I have my retopo tools of choice. I retopo'd with NEX, UV'd, then baked AO and Normals with xNormal.
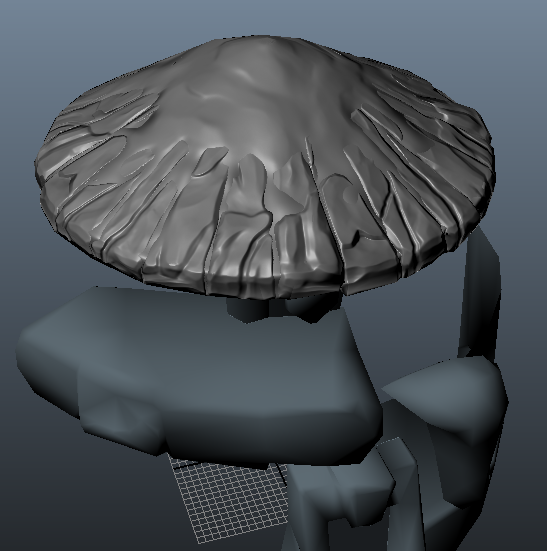
My first bake test was the roof(you can also see the modular low poly parts):
Then I baked the rest:
The "gate" part had some normal wackage:
Looks like I had some raycasting distance errors. I played with different ray distances but ended up just combining a couple different bakes and painting errors out by hand.
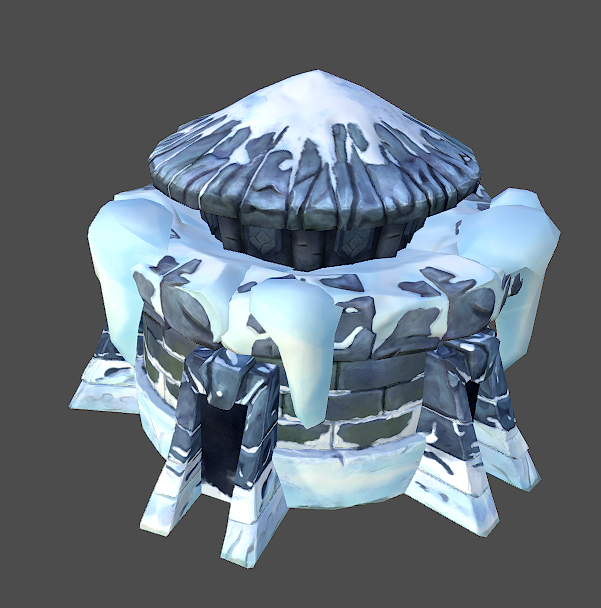
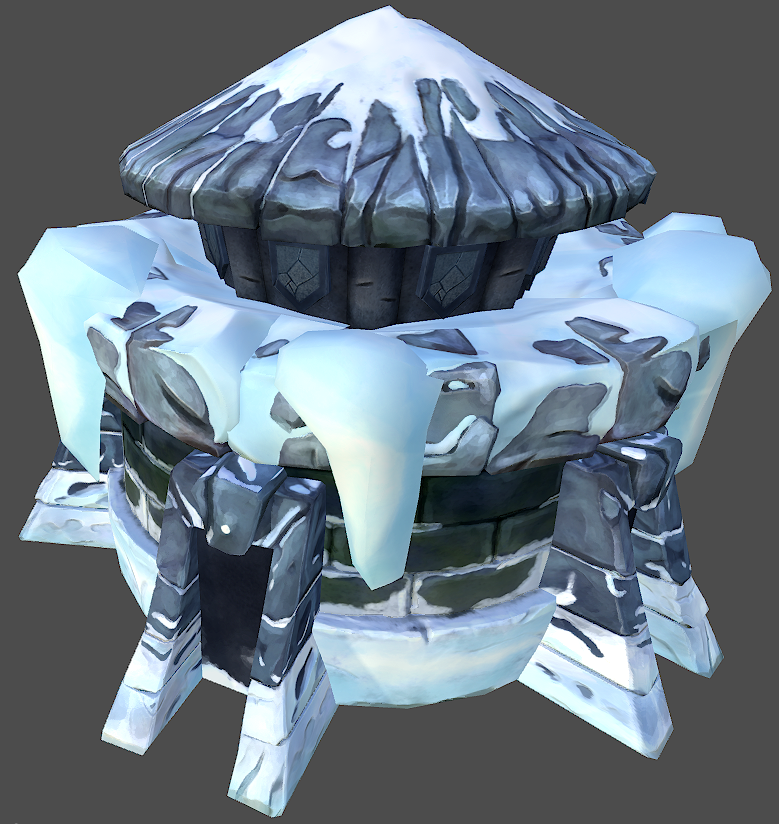
Here's some shots of the texture coming together. I'd be happy to go into further detail if anyone was interested:
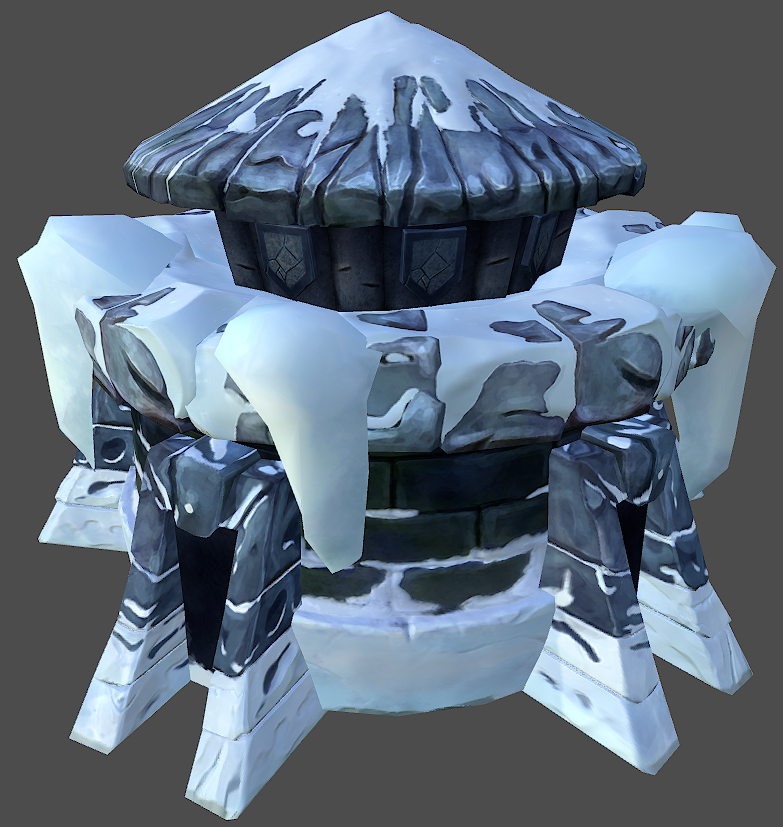
It was tons of fun - my first model in this style! I'm already planning on doing a whole scene in this style to correct some of the mistakes I made this time around.
Questions/crits/comments welcome.
The purpose of this thread is to show the thing off, show the stages of progress, perhaps help people learn to do it, and maybe get some tips for doing it better next time.
Hey there Polycount, just posting some WIP screens of this art test I did recently. Its totally not new information but maybe it will help someone
First off, props to those who came before and taught me:
Thank you Jason Lavoie (jasonlavoie.net), racer445 (racer445.com), and Adam Brommell(adambromell.com) for spreading the love via your post mortems/wips/tutorials. I'll just be lurking here sucking up everything you teach us
The subject of the art test was to update the pictured low poly asset with a fully sculpted normal + spec + diffuse at 1024 resolution. I was asked to do the snowy version:
The first thing I did was collect reference and do some sketches to determine how I would approach this thing. I also downloaded some tools to rip out and get a look at the game's original textures which gave me an idea of the texture style (Blizzardish).
Then I came up with some very simple cube meshes in 3dsMax, then exported them to ZBrush. I did do some simple UV'ing so I could break the mesh into polygroups once inside ZBrush.
The first part I sculpted was the base brick wall. I did a quarter of the cylindrical base of the wall, focusing on broad details. I knew that when I textured this thing I didn't want a ton of high frequency noise in the texture interfering with the paint strokes:
I continued on this way, focusing more detail toward the top of the model because the model was intended to be viewed from a top-down strategy game angle:
I ended up layering snow onto the base stones exclusively in ZBrush by appending poly cubes to my tool then moving them around. This is how I added snow to the roof and turret.
Once I was satisfied with the high poly, I decimated it and imported it into Maya where I have my retopo tools of choice. I retopo'd with NEX, UV'd, then baked AO and Normals with xNormal.
My first bake test was the roof(you can also see the modular low poly parts):
Then I baked the rest:
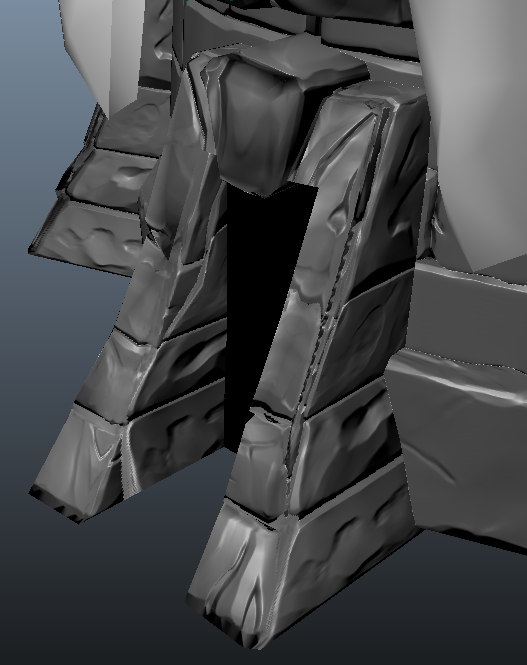
The "gate" part had some normal wackage:
Looks like I had some raycasting distance errors. I played with different ray distances but ended up just combining a couple different bakes and painting errors out by hand.
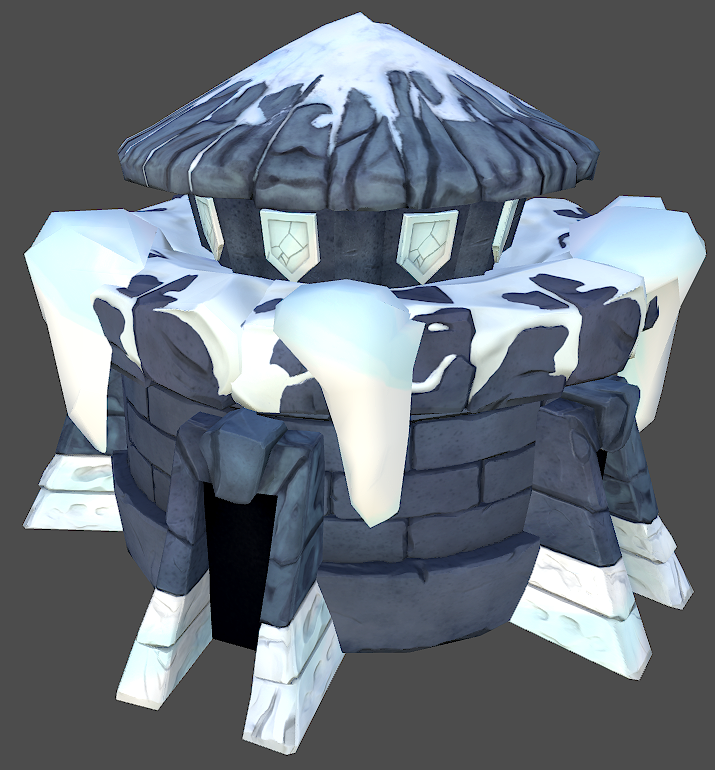
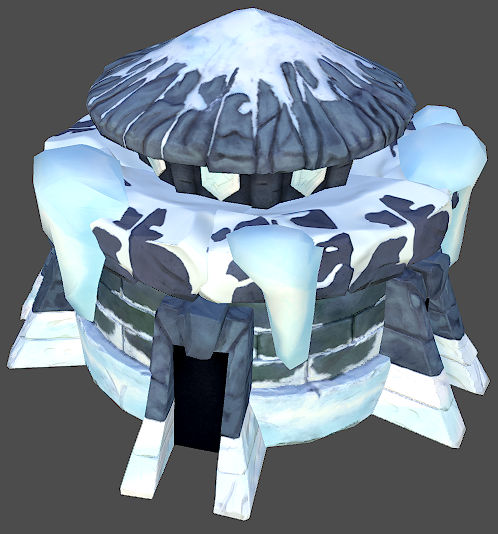
Here's some shots of the texture coming together. I'd be happy to go into further detail if anyone was interested:
It was tons of fun - my first model in this style! I'm already planning on doing a whole scene in this style to correct some of the mistakes I made this time around.
Questions/crits/comments welcome.
Replies
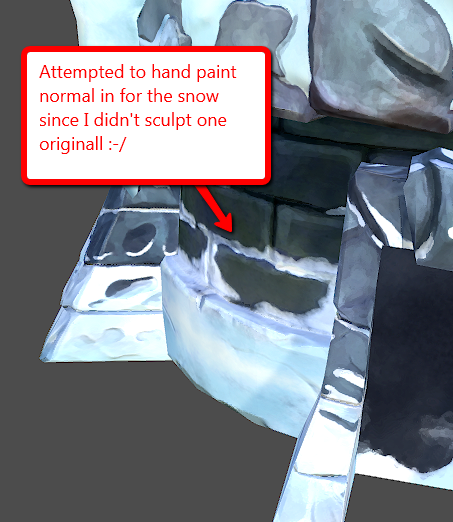
It's a minor detail, but that stood out to me. Looks great!
(Hope you don't get in trouble for sharing an art test!)
I agree, this is one of the major weak spots of the piece. I think I would darken the snow and then take better advantage of the spec to make the snow sparkle a bit more...
Didn't sign anything, think I'll check with them just to make sure posting this won't piss anybody off. If the thread mysteriously disappears then you'll know why. :shifty:
This thread is not a WIP, it is a post-mortem. I turned the art test in 7 days ago. Just wanted to share the model with the community.